
Guía paso a paso
¡Encuentra todos los procedimientos completamente explicados!
Siéntete siempre apoyado, incluso cuando no estás en contacto con nosotros.
Temas relacionados
Ver másUtilities
Customer area
How to import products in Moloni
Moloni allows you to import products and/or services, being possible to select different columns with the desired data. The mechanism is fast and simple, warning when the document is ready.
Below we will list all the columns that can be imported:
- Name*;
- Categorie*;
- Price*;
- Price with tax*;
- Reference*;
- Summary;
- Type (Product or Service)*;
- Unit of Measurement*;
- Tax value;
- Stock;
- Min. Stock;
- Exemption justification;
- Supplier - code;
- Supplier - NIF;
- Supplier - Cost price (excluding VAT)
- Supplier - internal reference;
- Price - name;
- Tariff - value (excl. VAT)
- Tax - name*;
- Tax - percentage*;
- Tax - exemption justification*;
- Warehouse - Code;
- Warehouse - Name;
- Warehouse - Min. stock;
- Warehouse - Stock ;
- Variants - within these variants the warehouse and its corresponding stock can be imported, but they must be created before they can be imported. For more information see this Guide.
- Variants - Price - Name;
- Variants - Tariff - Value.
To know how to import other data, click here.
The fields marked with * are mandatory.
Important note
The last three points are mainly focused on taxes, in the Tax - name, if the tax is previously created in Moloni you must place in the column the same name, so as not to create a duplicate tax.
If you place a single column with the Tax - percentage, not having an associated name, it will create a new tax that after the import must be accepted to place the visible products.
When you import the warehouse, the import will be guided by the code of the warehouse that you may have already created previously in Moloni, in absence of the same one it will be guided by the name of the warehouse.
Follow these steps:
1. Go to the menu Utilities > Imports.
2. Next, have the file at hand and place it in the box.
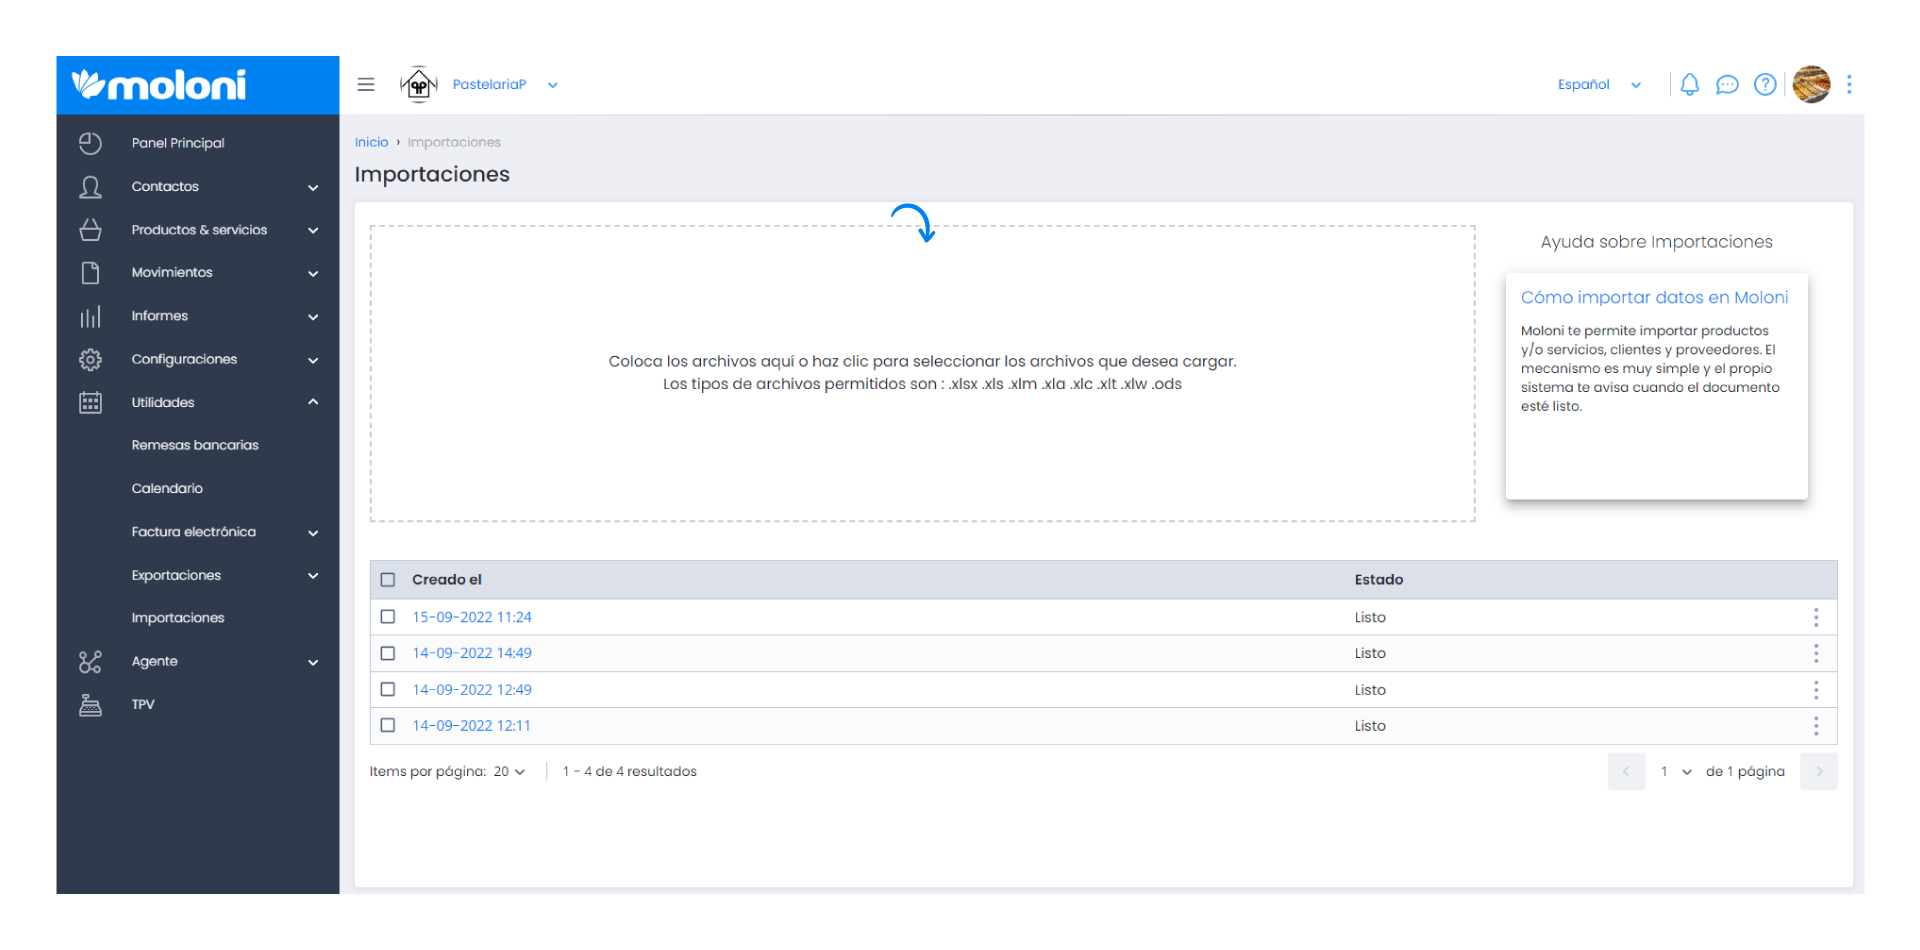
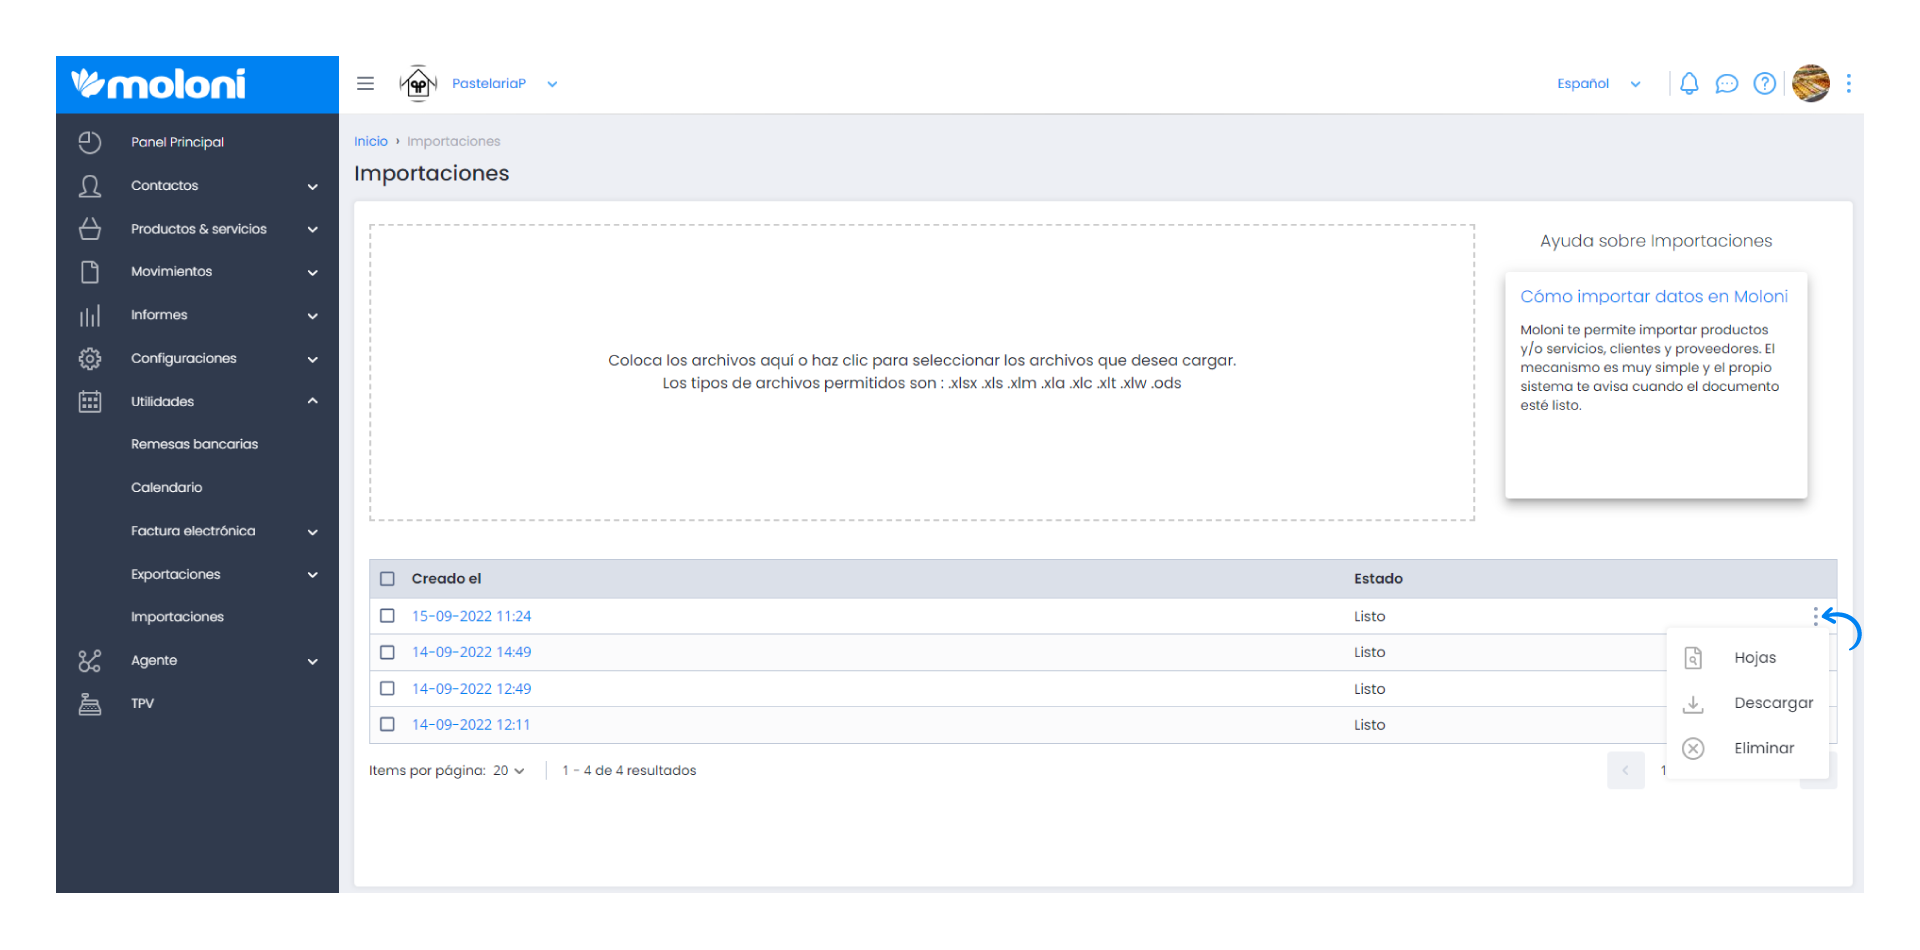
3. Then, the system will warn you when it is ready and click on the 3 dots and select Sheets.
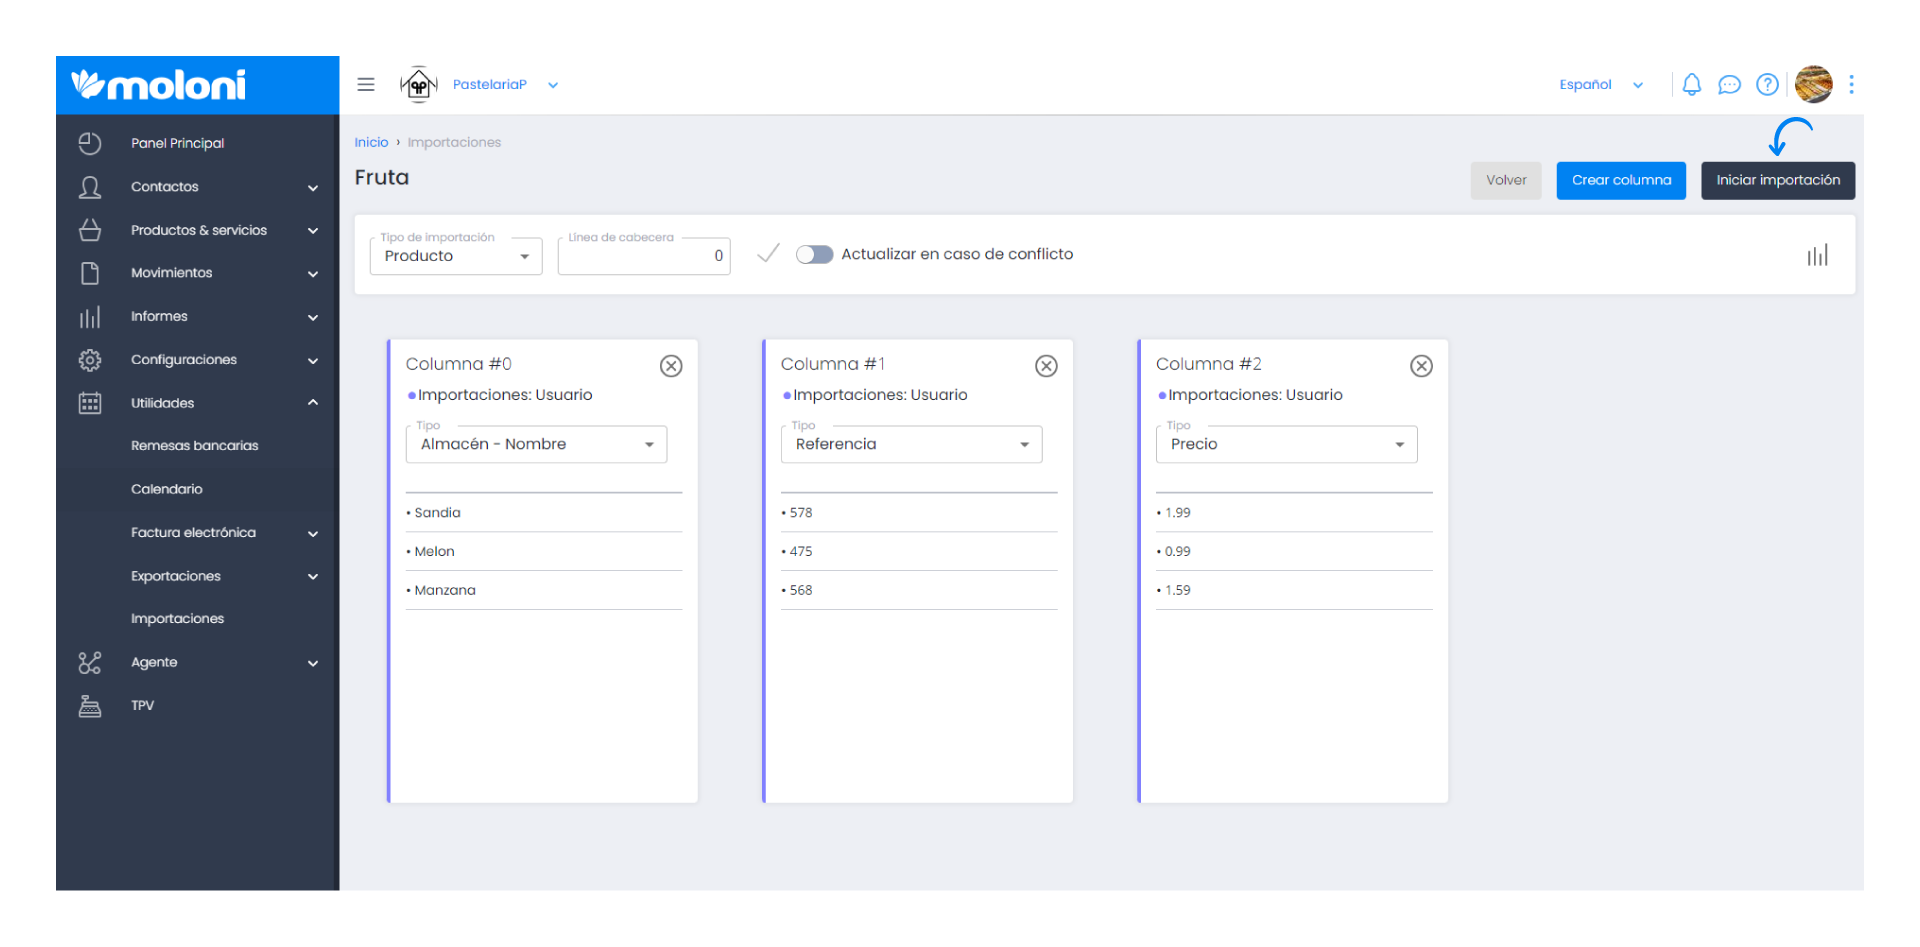
4. Start organising, first of all, under Import Type choose Product. In the Header Line choose the line that corresponds to the header of the file. It is important to activate the check mark next to it if you have changed the header line. Click on this button to activate the option you choose.
Here you select the columns you intend to import, according to the points that have been commented above.
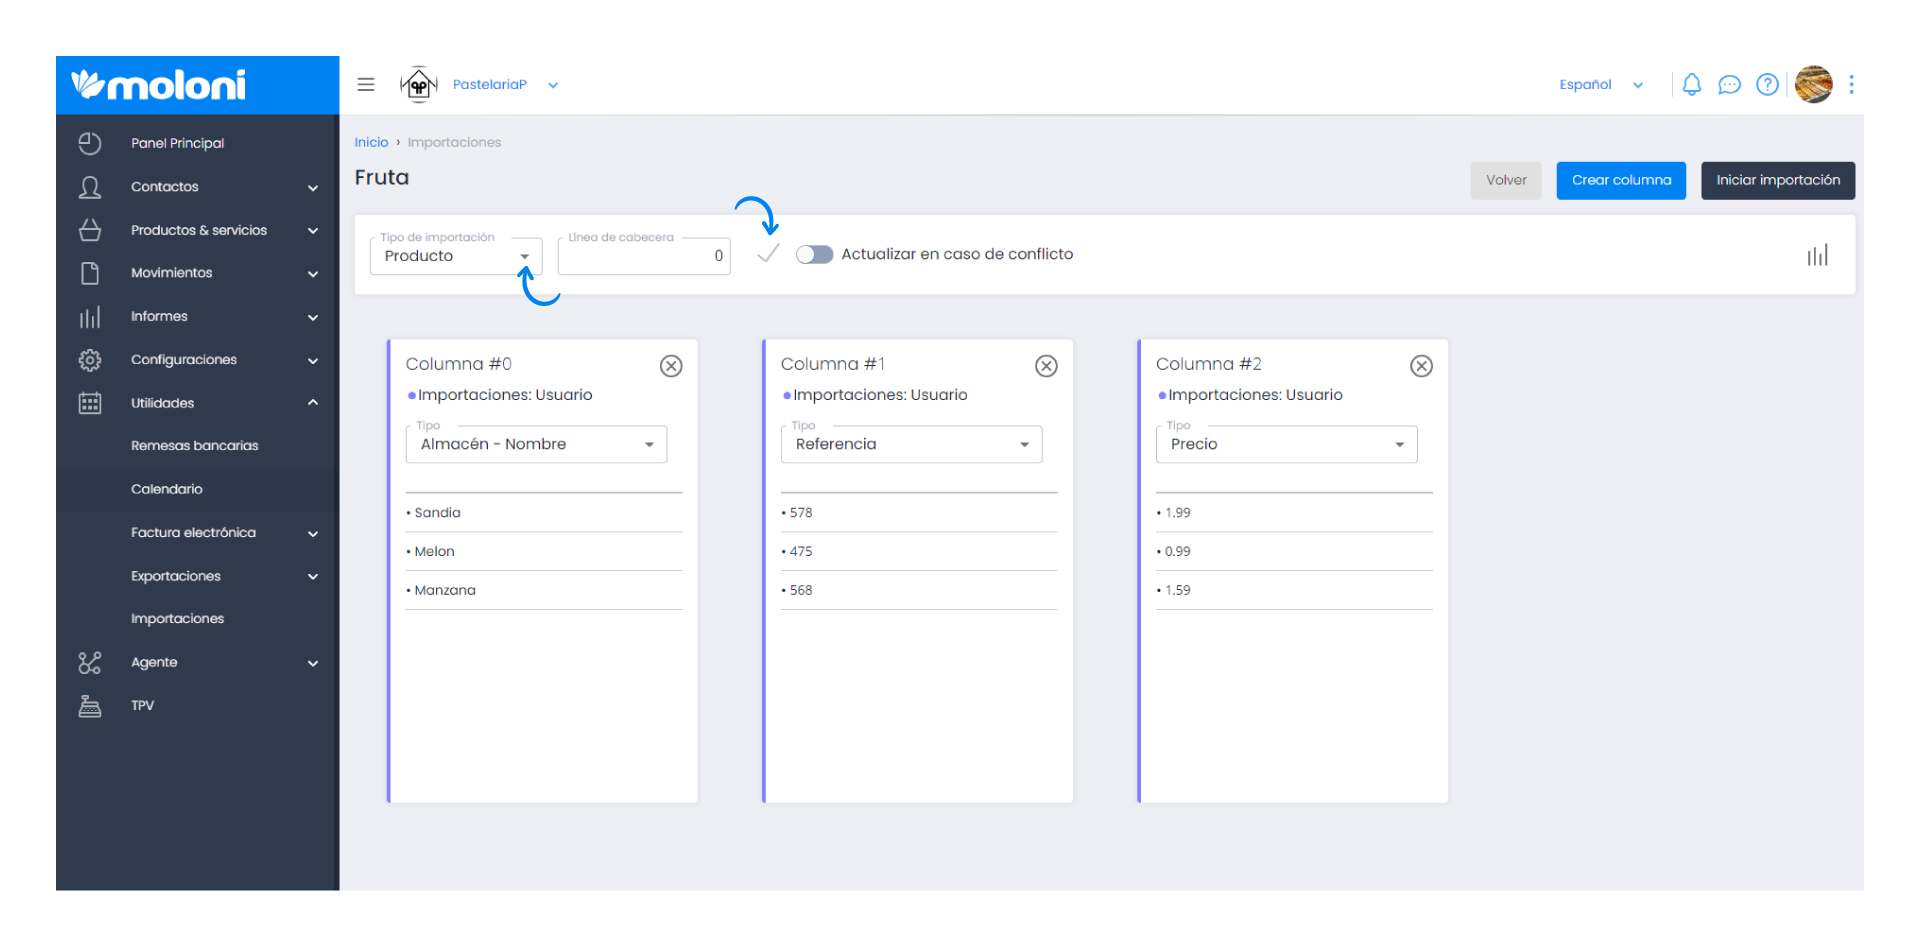
5. After you have organised your data and selected the correct option for each column. Click Start Import to have the products imported.
Encuentra aquí todo lo que necesitas
Ayuda complementaria
Asuntos relacionados con "Customer area"
Otros temas de ayuda
Nuestra documentación está organizada por familias y subfamilias
que son actualizadas con regularidad para que puedas estar al corriente de las modificaciones, consejos y trucos.
Suscripción a nuestra Newsletter
Noticias sobre el software, legislación y otra información de interés.
Descargar la App


Sobre Moloni
PresentaciónCaracterísticasTPVPlanes y preciosÁrea de clienteDesempeño y SeguridadSobre NosotrosLegalAplicaciones móviles
Moloni ManagerIntegración y Socios
APIMoloni Pro ConnectorTicketBAIPrestaShopShopifyWooCommerce