
Guía paso a paso
¡Encuentra todos los procedimientos completamente explicados!
Siéntete siempre apoyado, incluso cuando no estás en contacto con nosotros.
Temas relacionados
Ver másUtilities
Customer area
Create event - Practical example
To understand the flexibility of the system, let's take an example of what you can create in an event action.
For more information on creating scheduled events, please refer to this guide.
Imagine that your company needs to create an invoice every week, finalise the document and send it by e-mail to the customer and at the same time send a copy of the document to your advisor/accountant.
The following steps illustrate how to do this process.
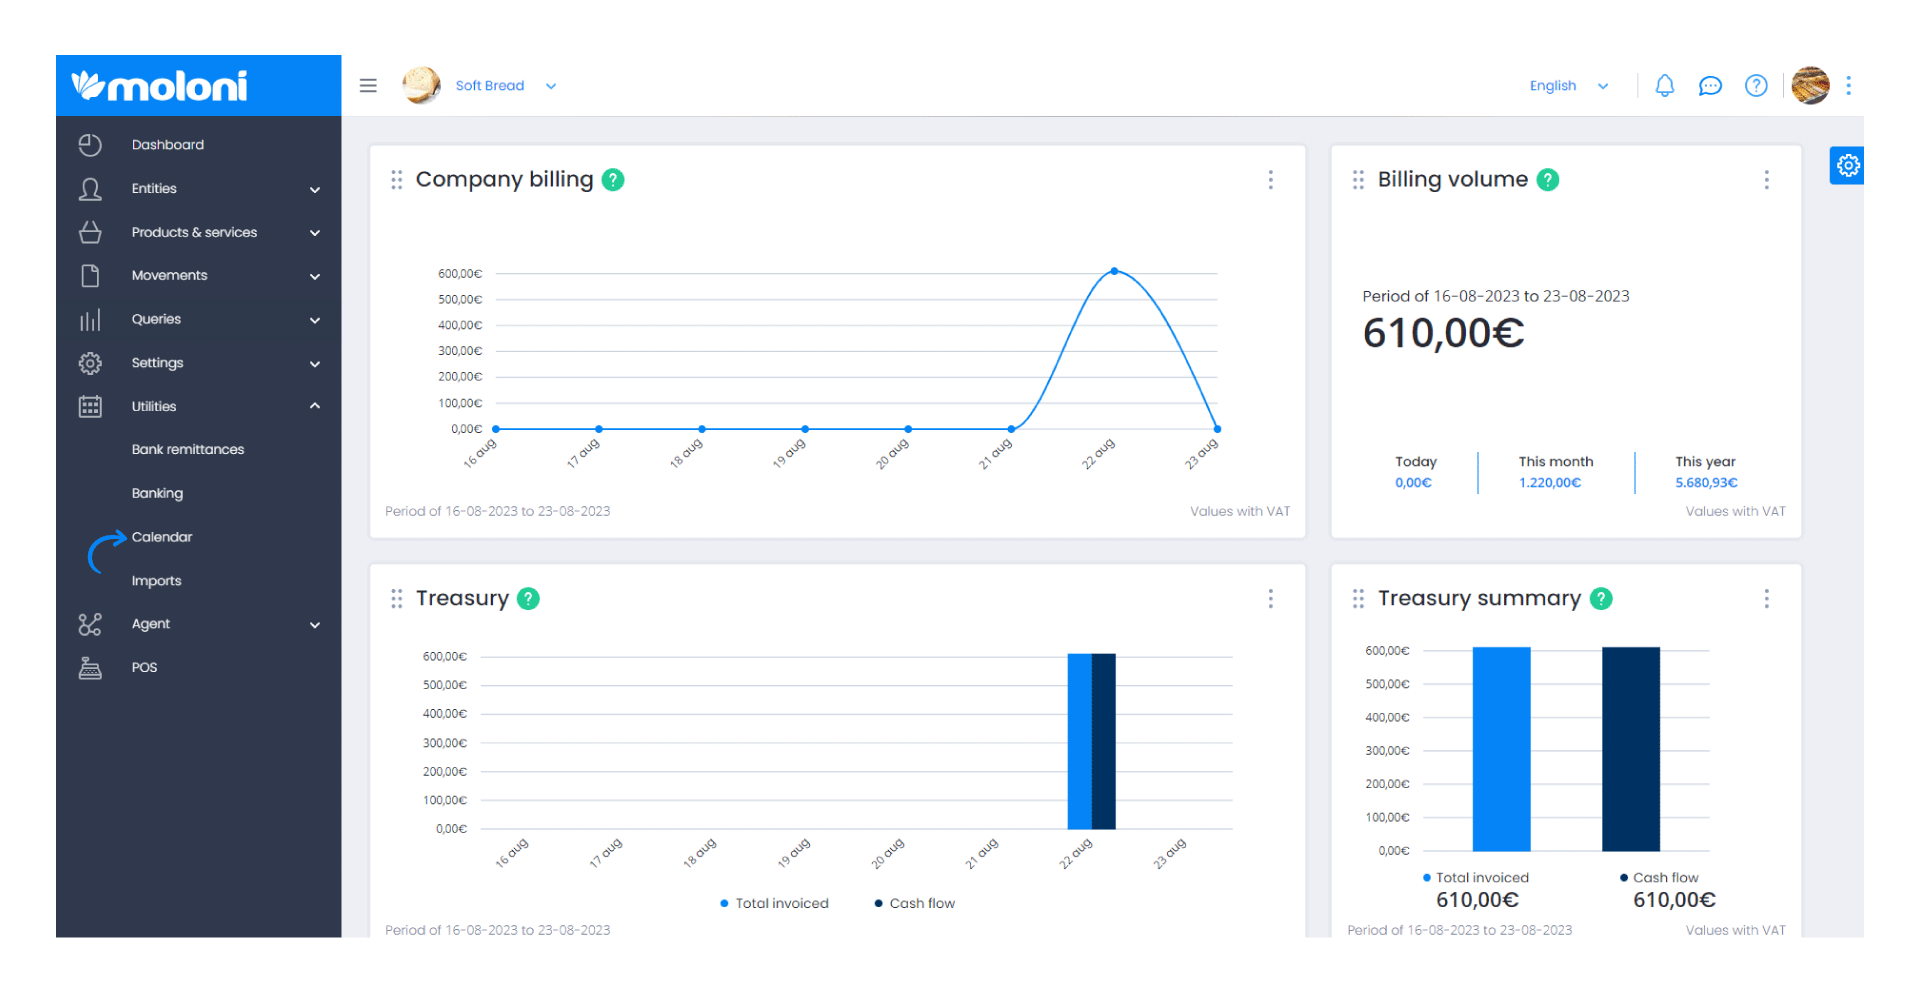
1. First go to Menu - Utilities - and click on Calendar.
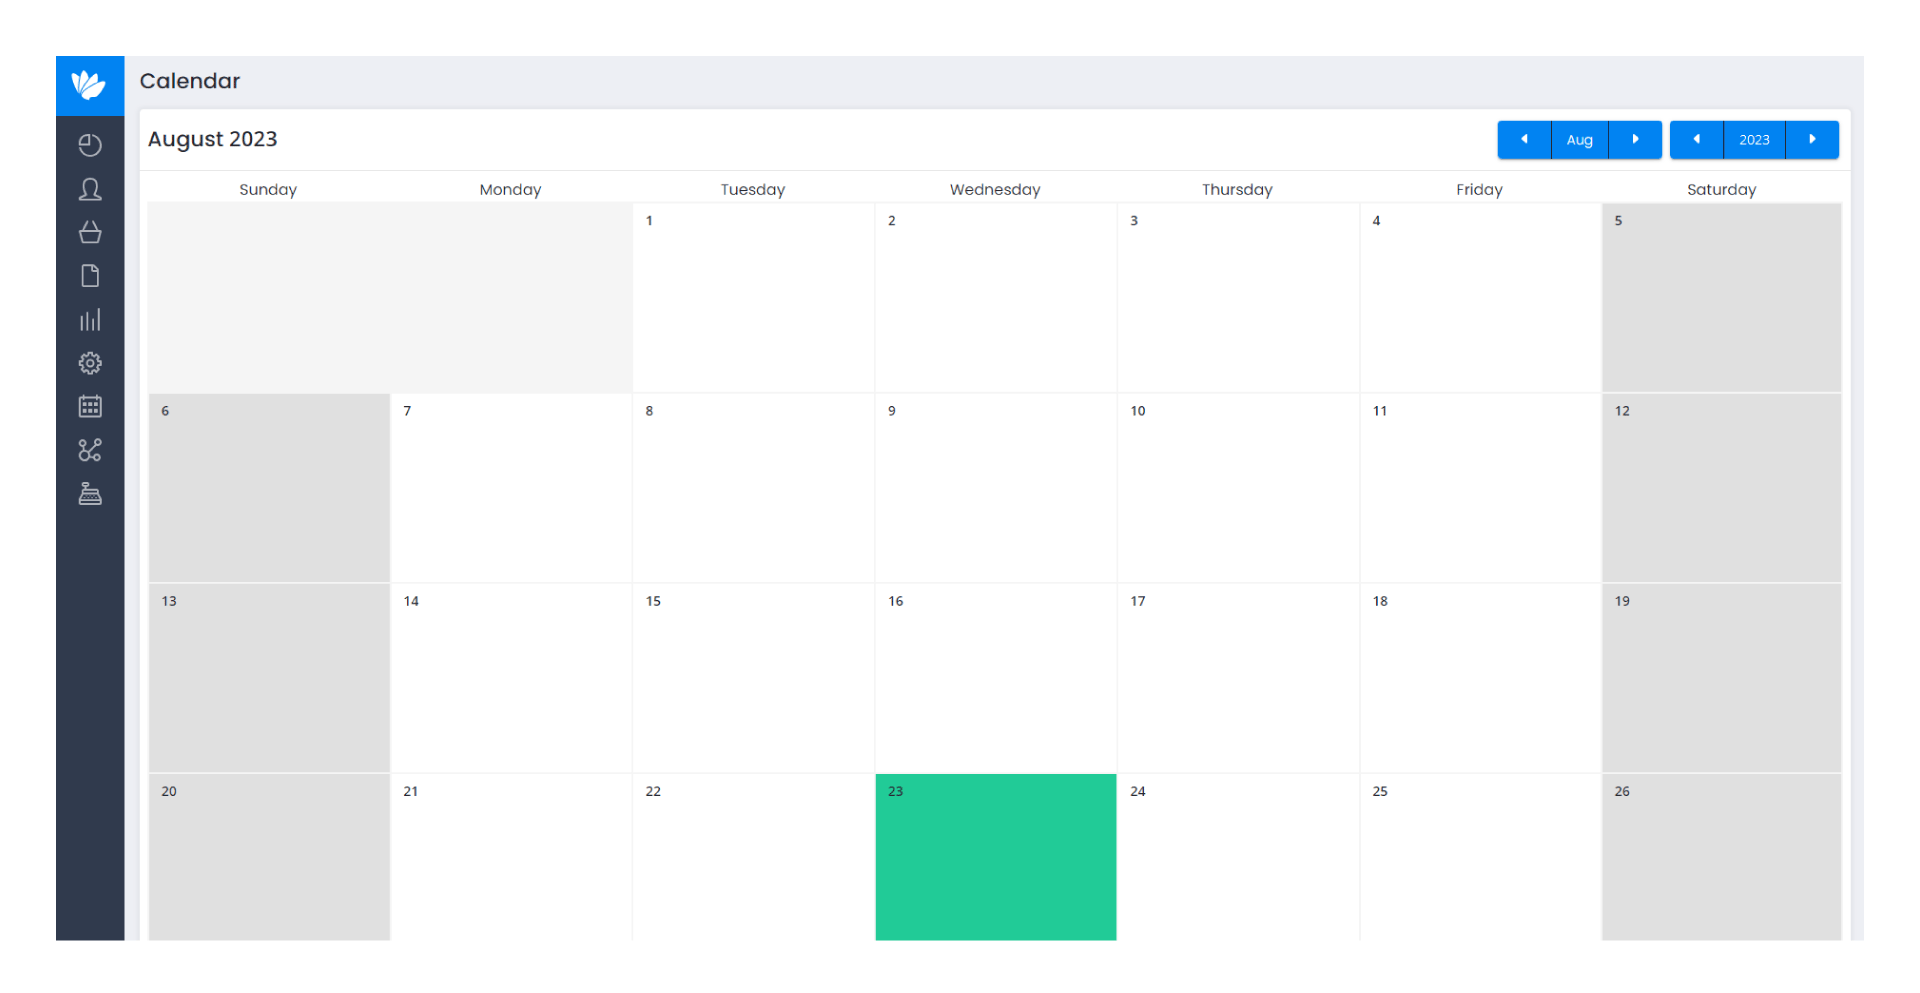
2. Click on the day you want to create a new event.
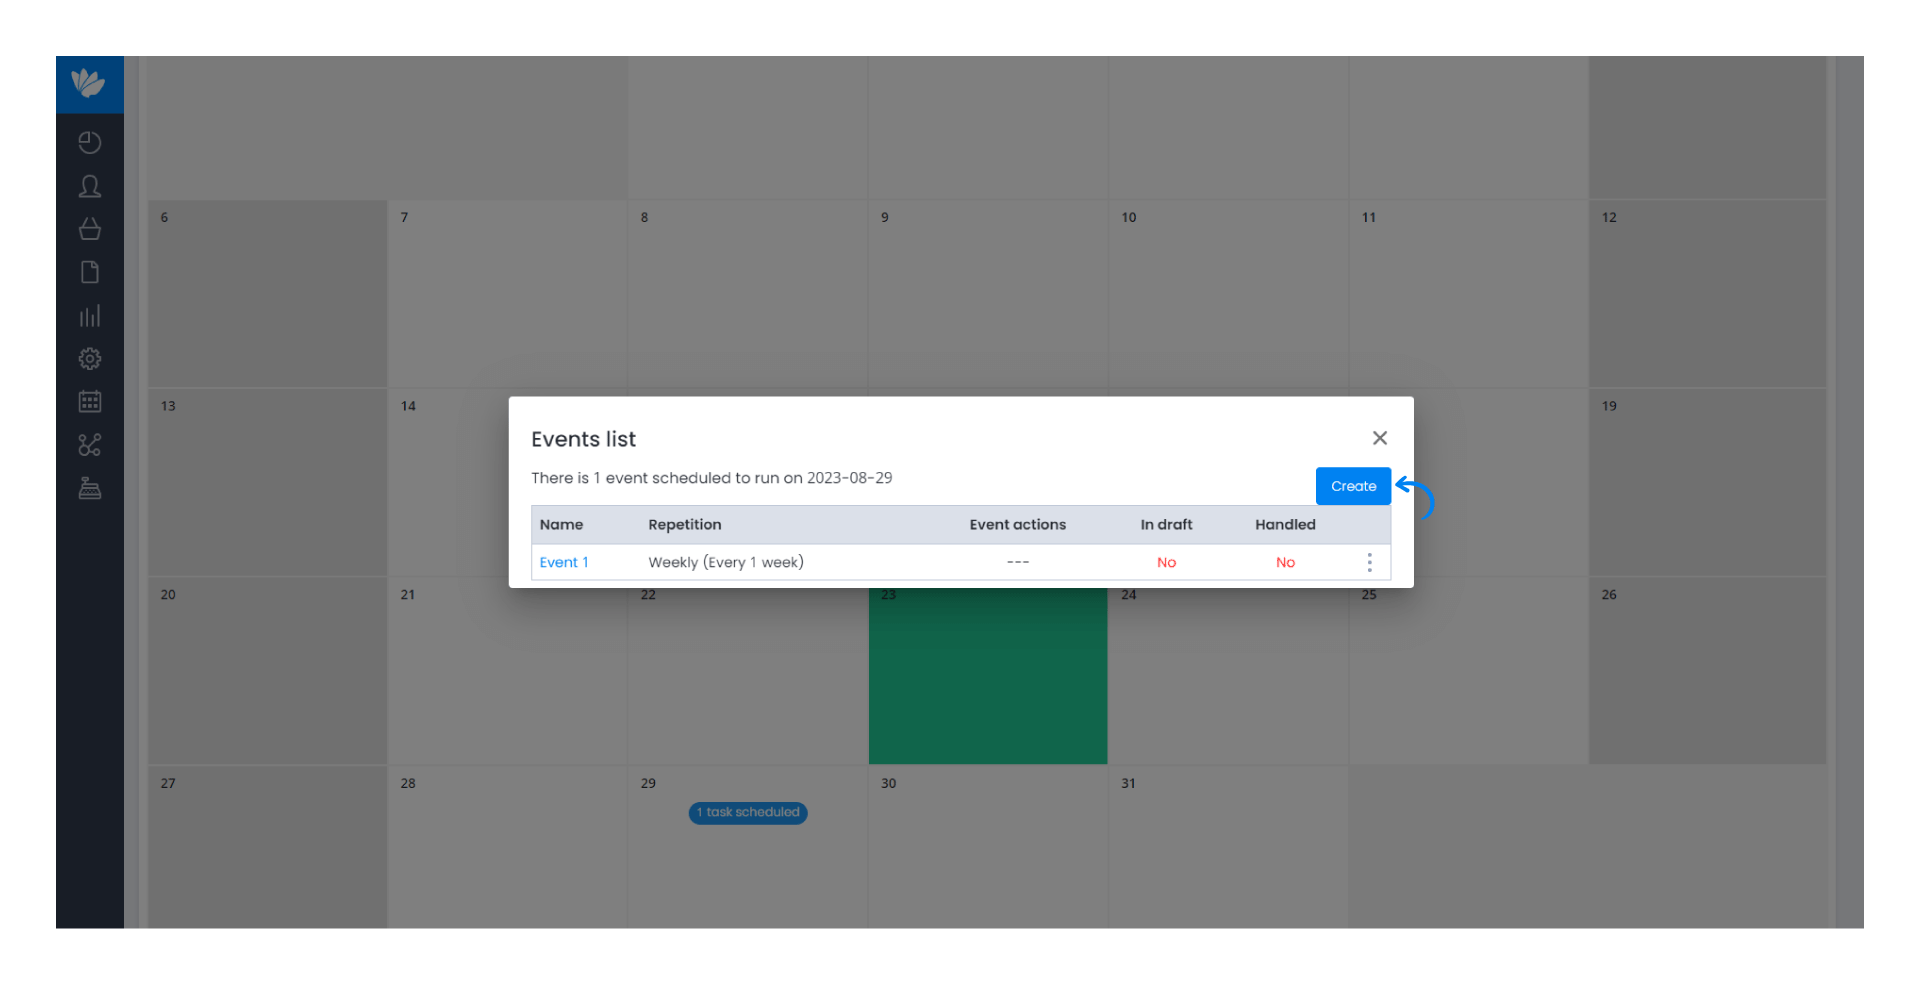
3. A new window will appear with the events you have scheduled for that day. To add a new event, click on Create. If you have chosen a day that does not contain any type of event, you must go directly to the image of the fourth step.
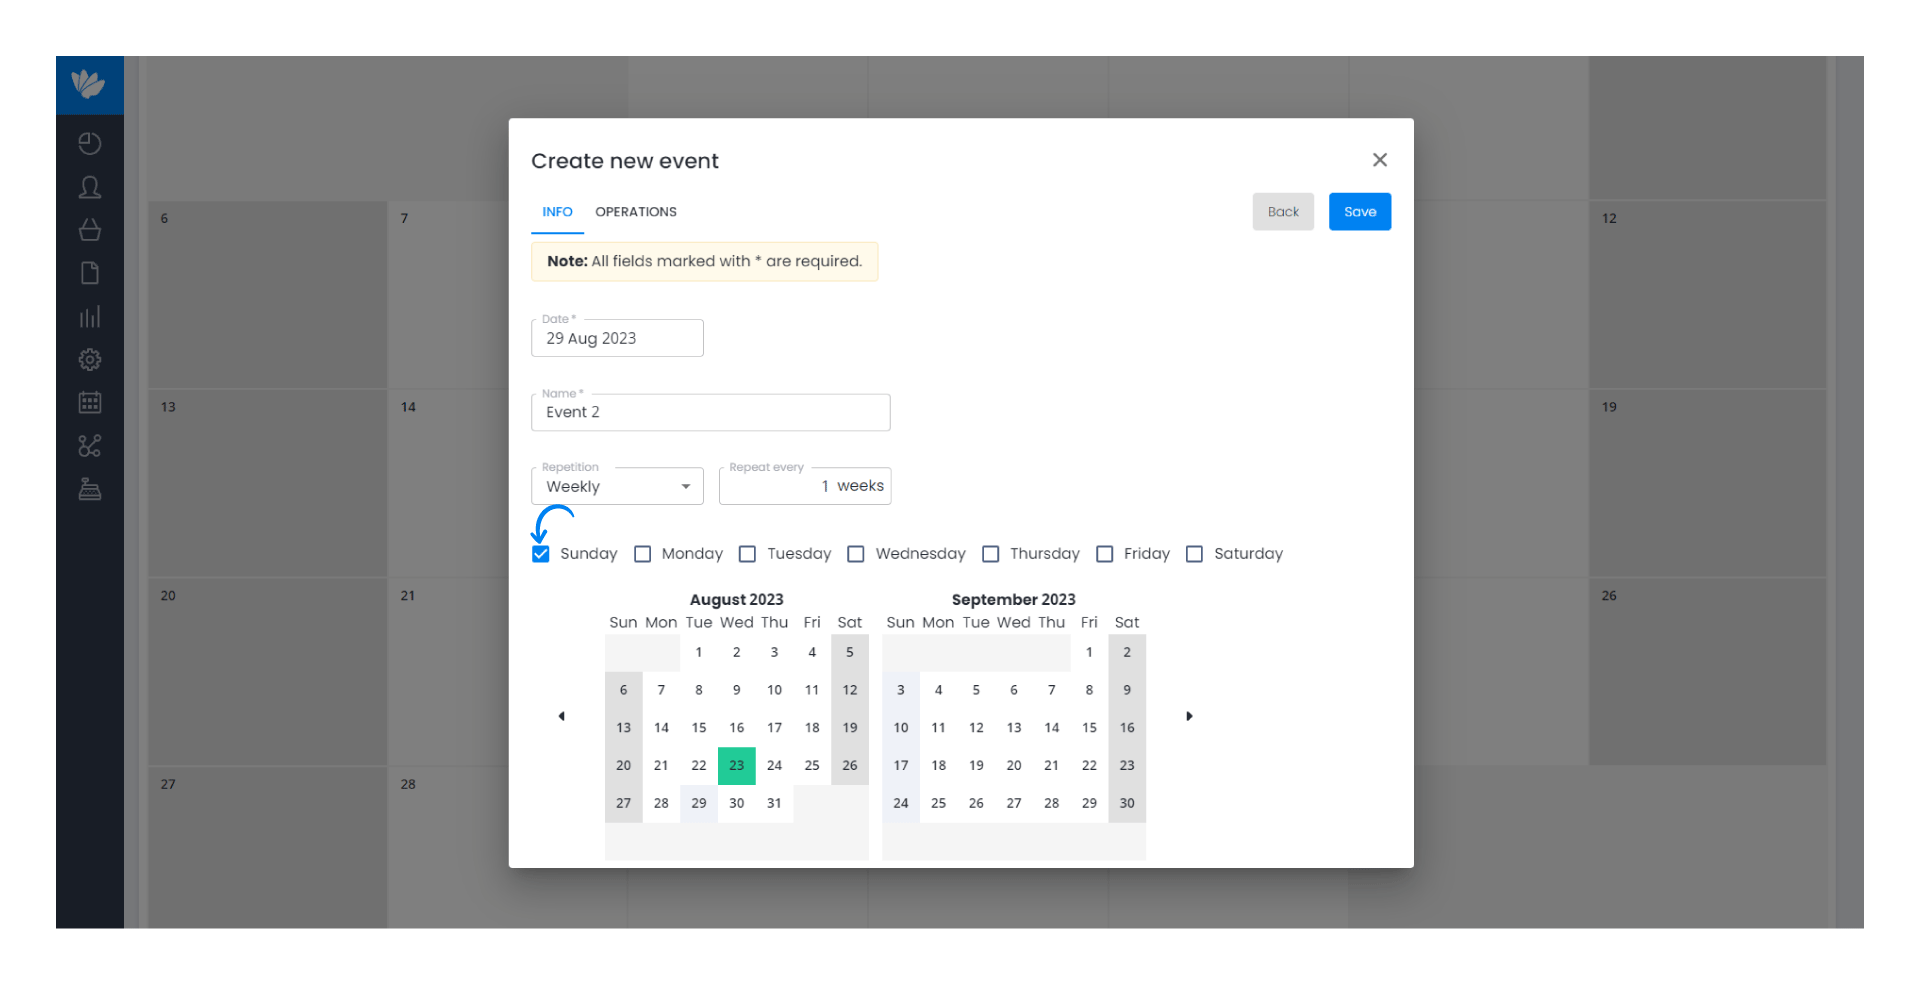
4. In the General tab, fill in the information. In relation to the Repetition in this case let's choose the option Weekly.
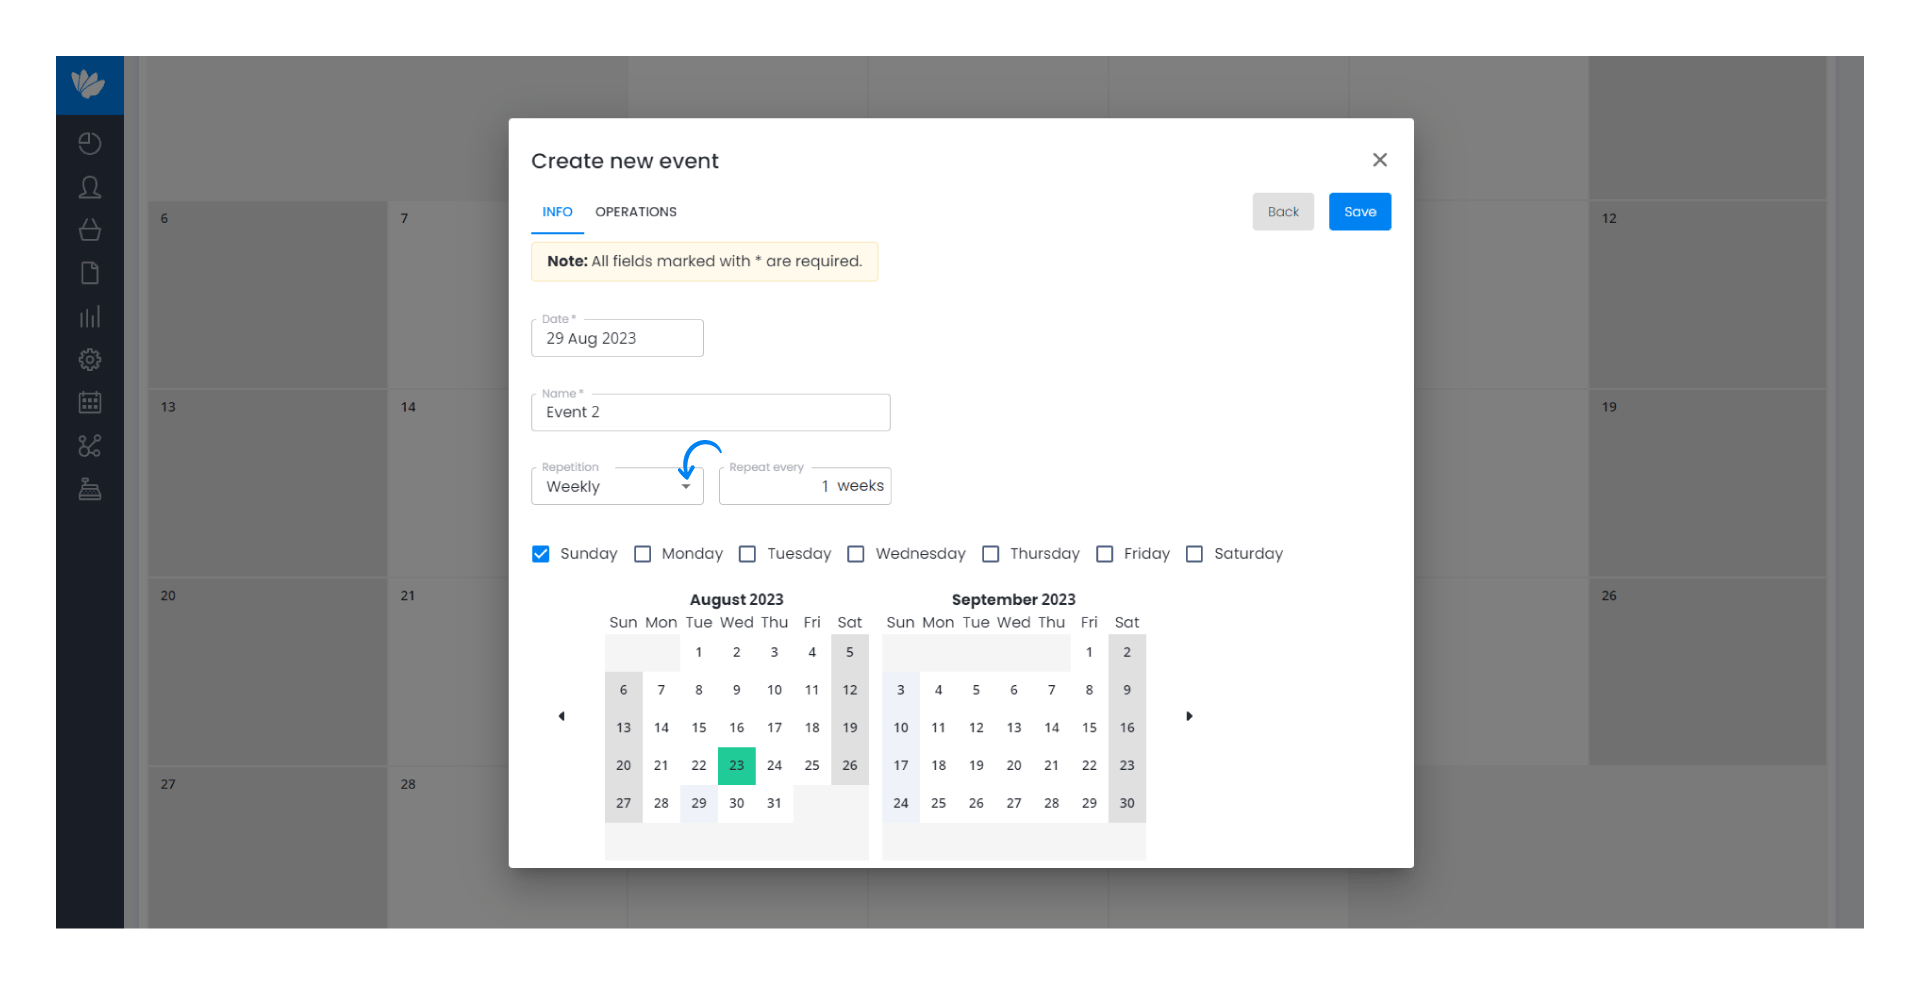
5. Then, choose the way in which the event will be repeated. In this case it will be every week, and you can choose the day you want the event to be activated.
In the calendar you can see the selected options.
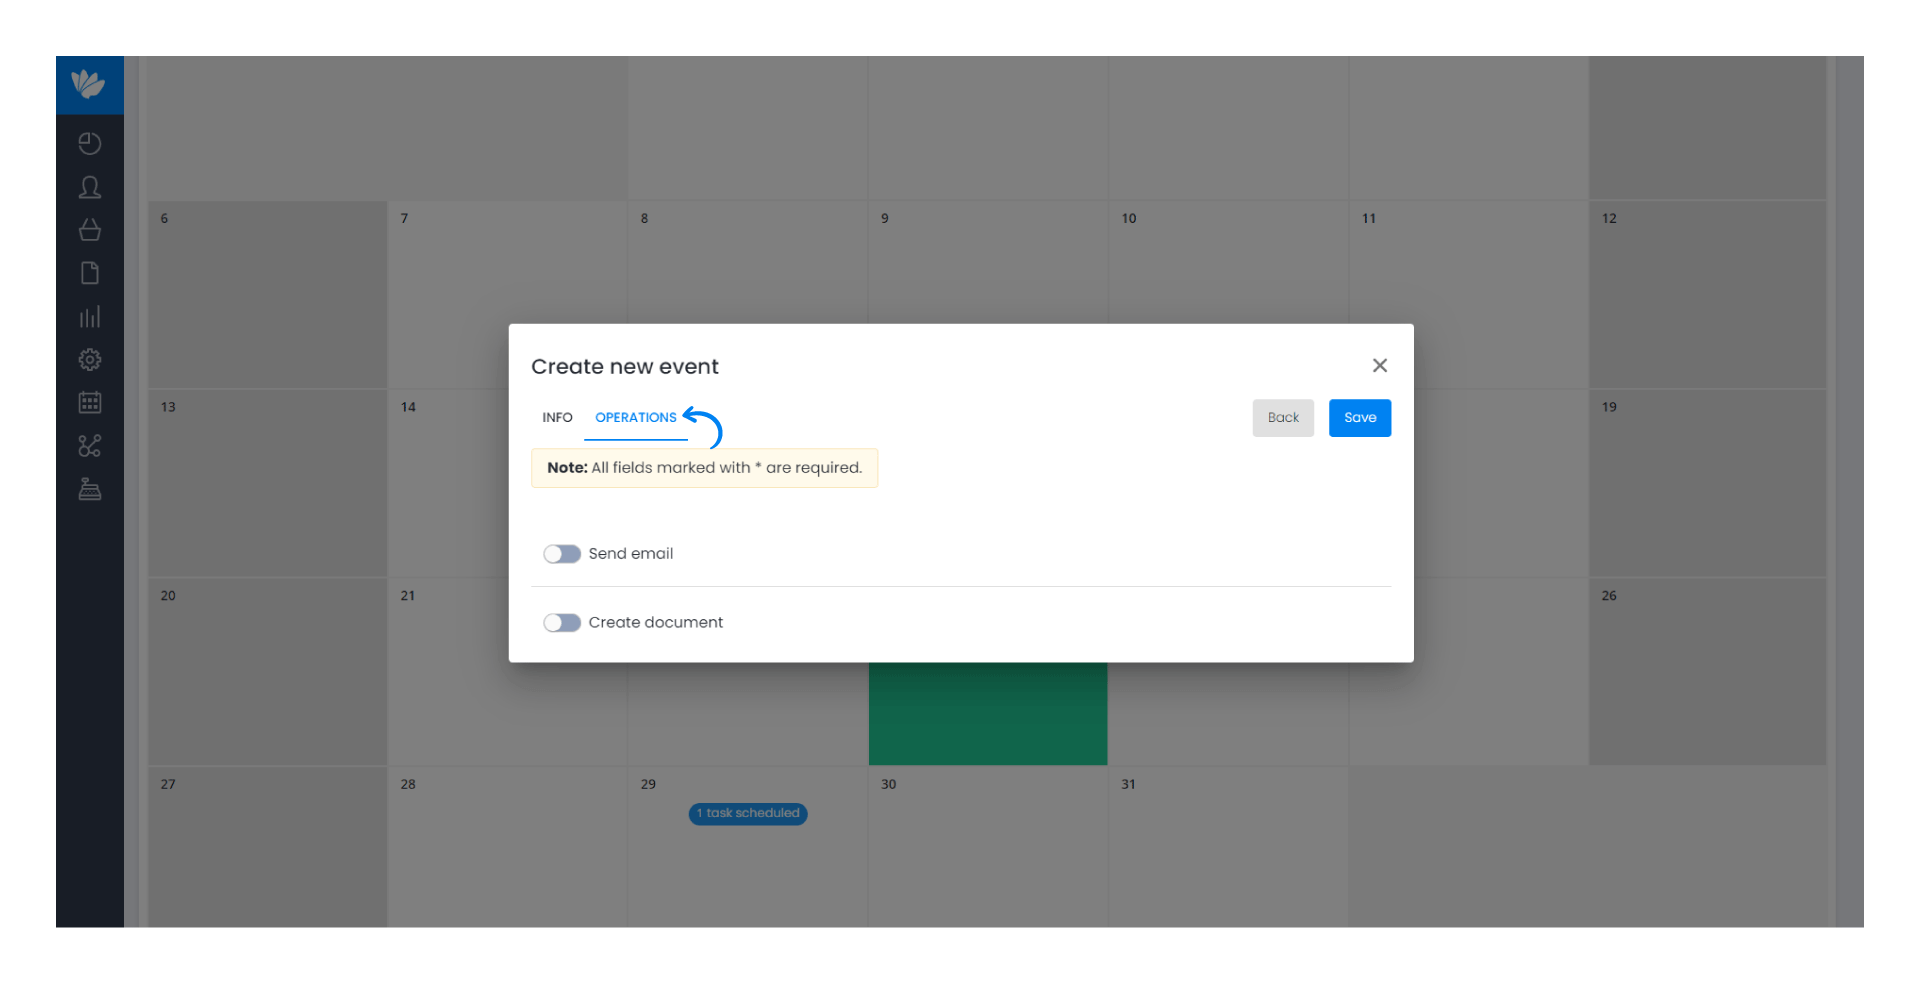
6. In the Operations tab, we have two options that correspond to two types of events that can be carried out: Send by e-mail and/or Create document, the latter is the one we are going to use for the example.
7. Therefore, we activate the option Create document and fill in the necessary information.
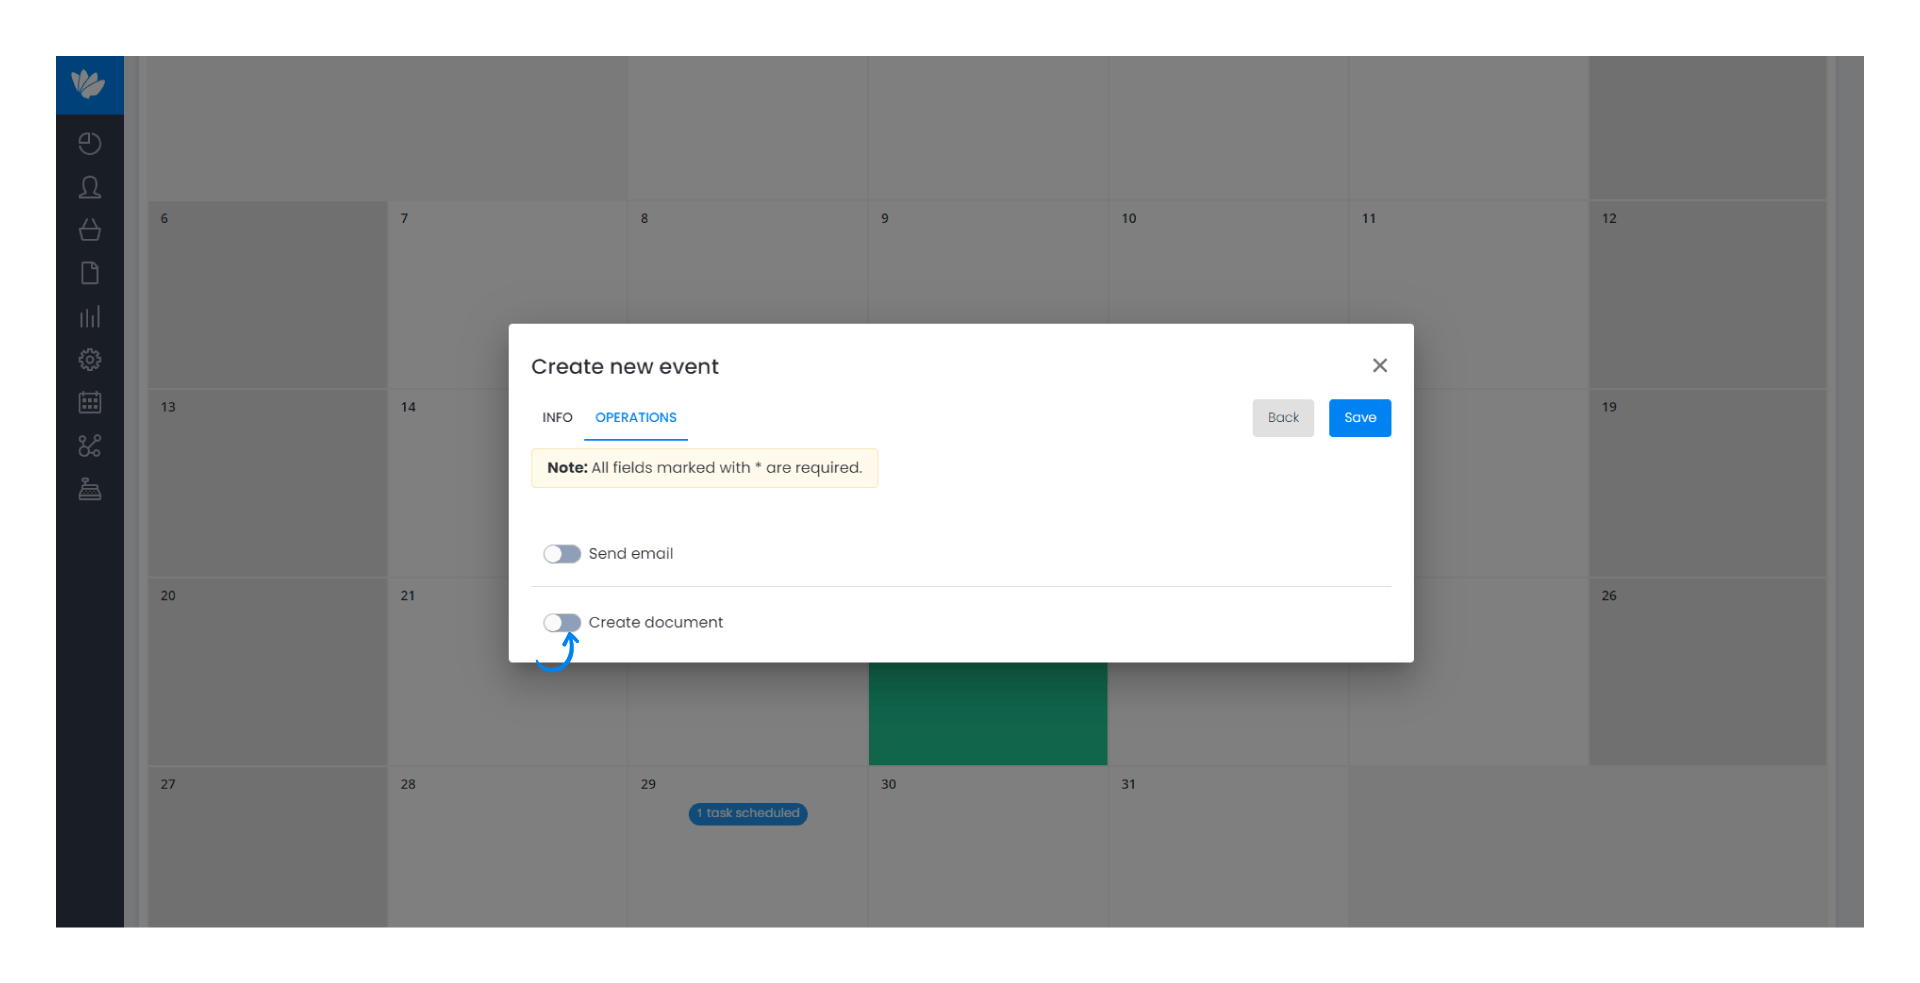
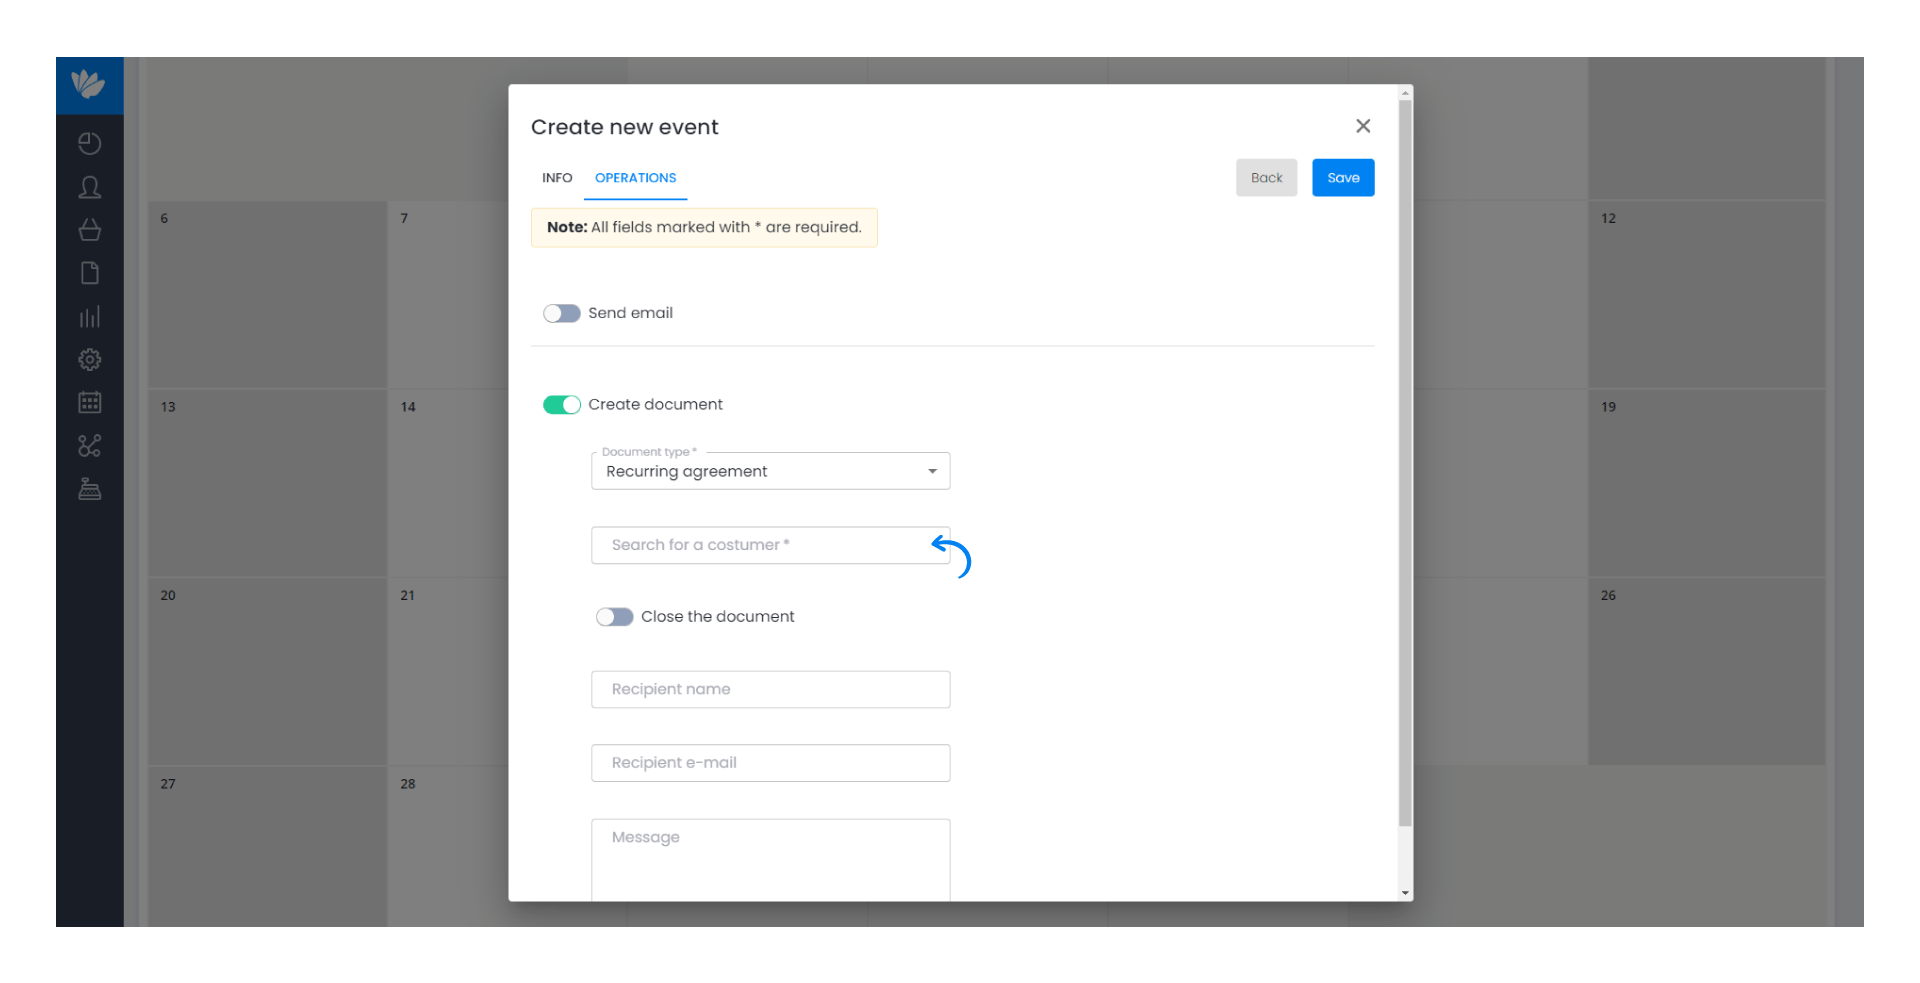
First of all, we select the option Recurring agreement for the Document type.
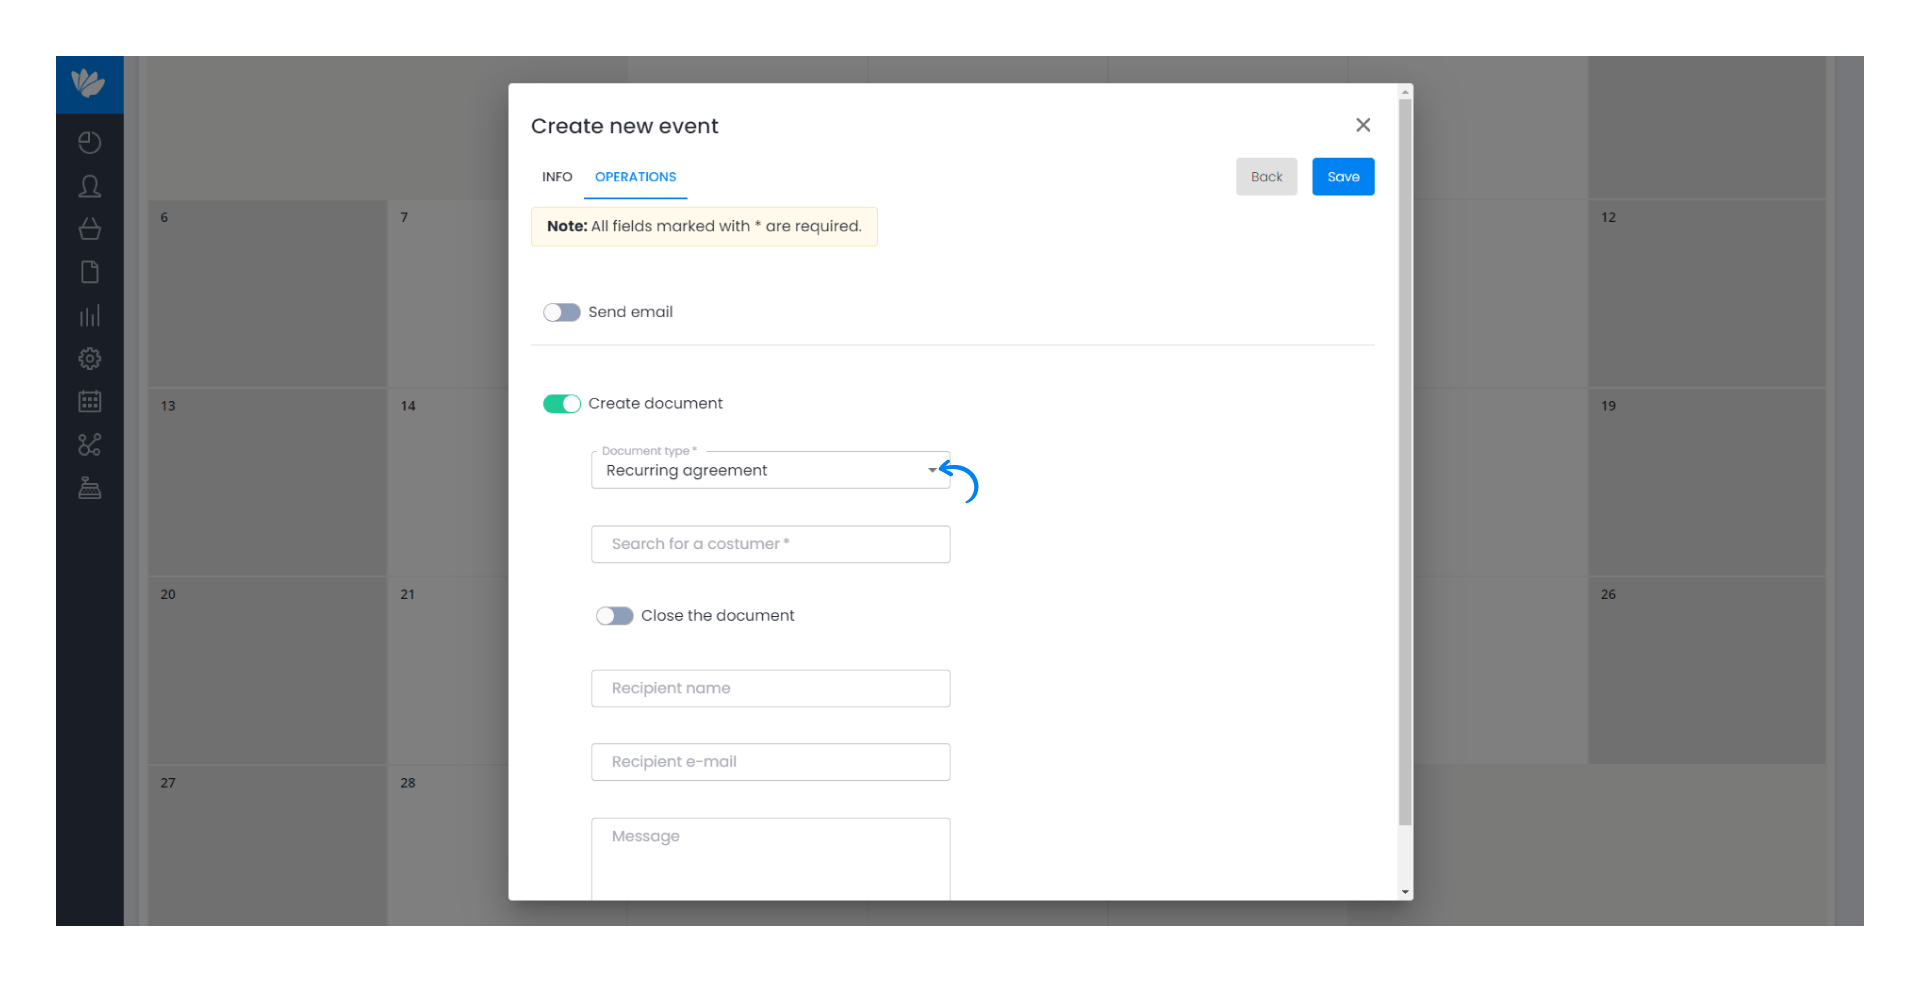
8. Then we look for the customer.
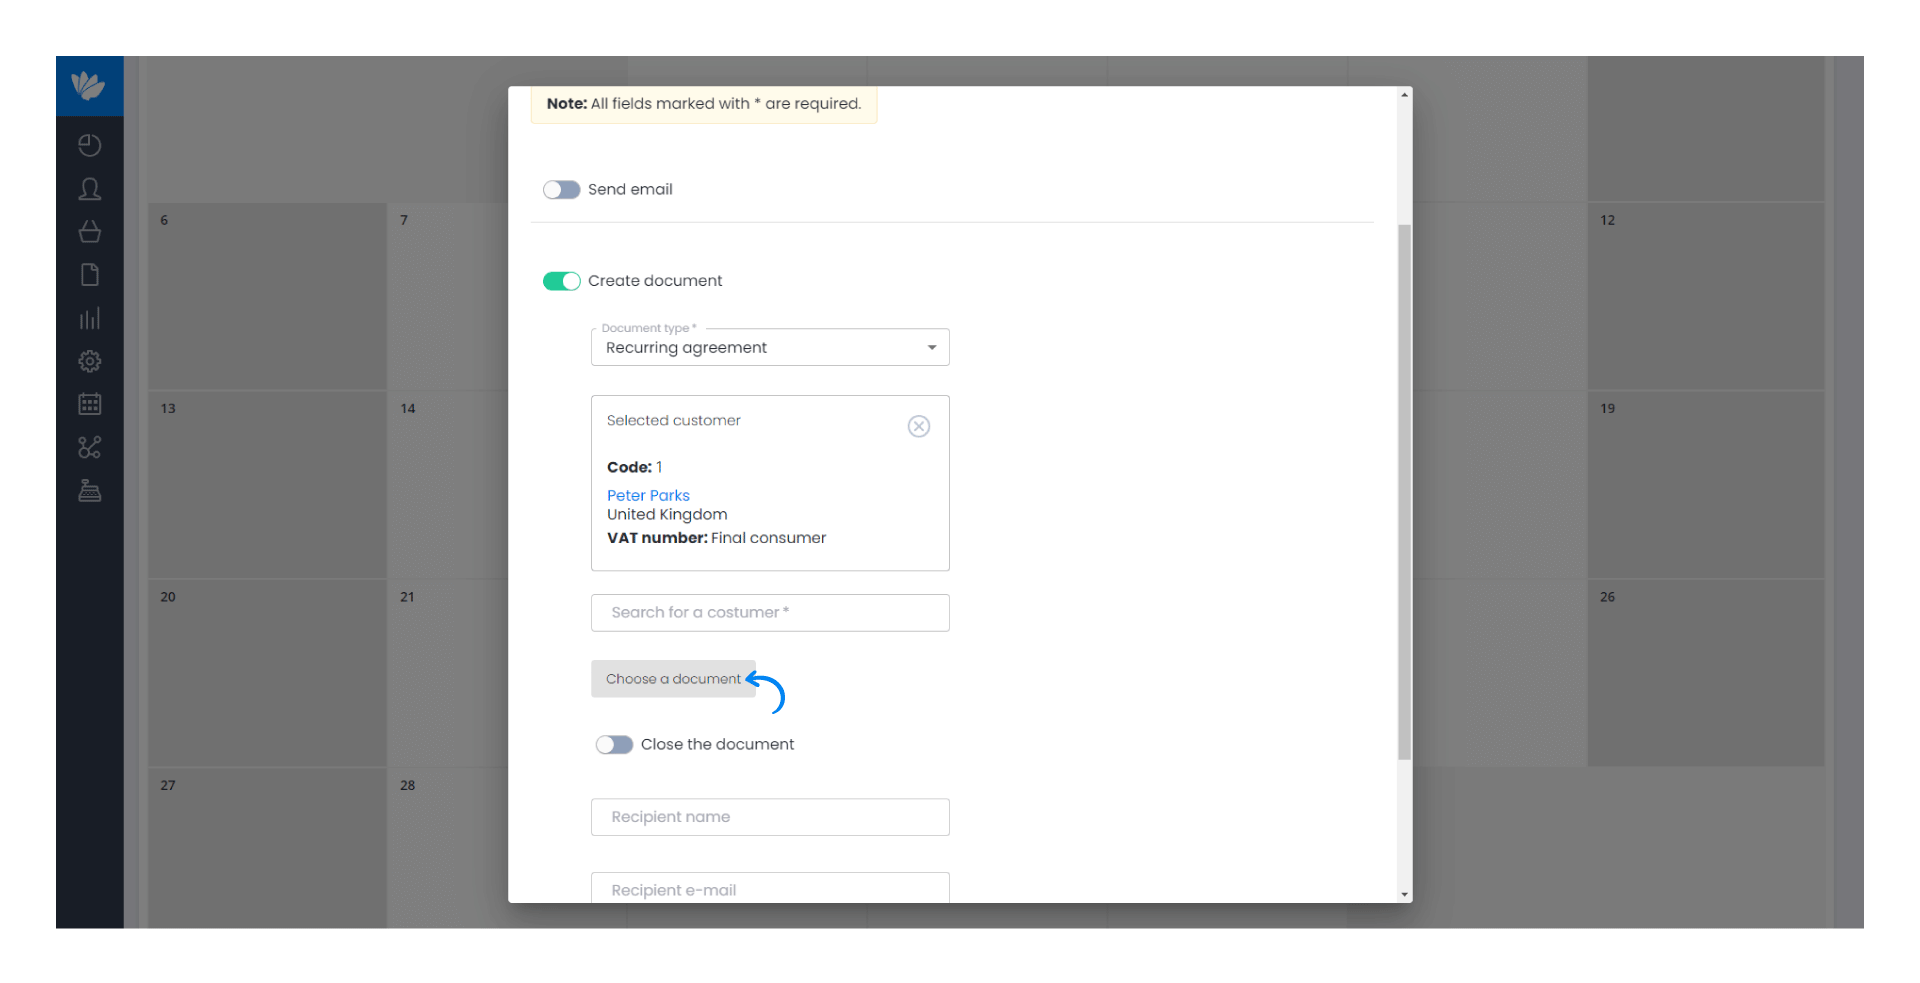
9. Next we have to Choose a document in order to choose the recurring agreement we want to use as the document source.
10. Now we are going to choose the Type of destination document which in this case is going to be an invoice.
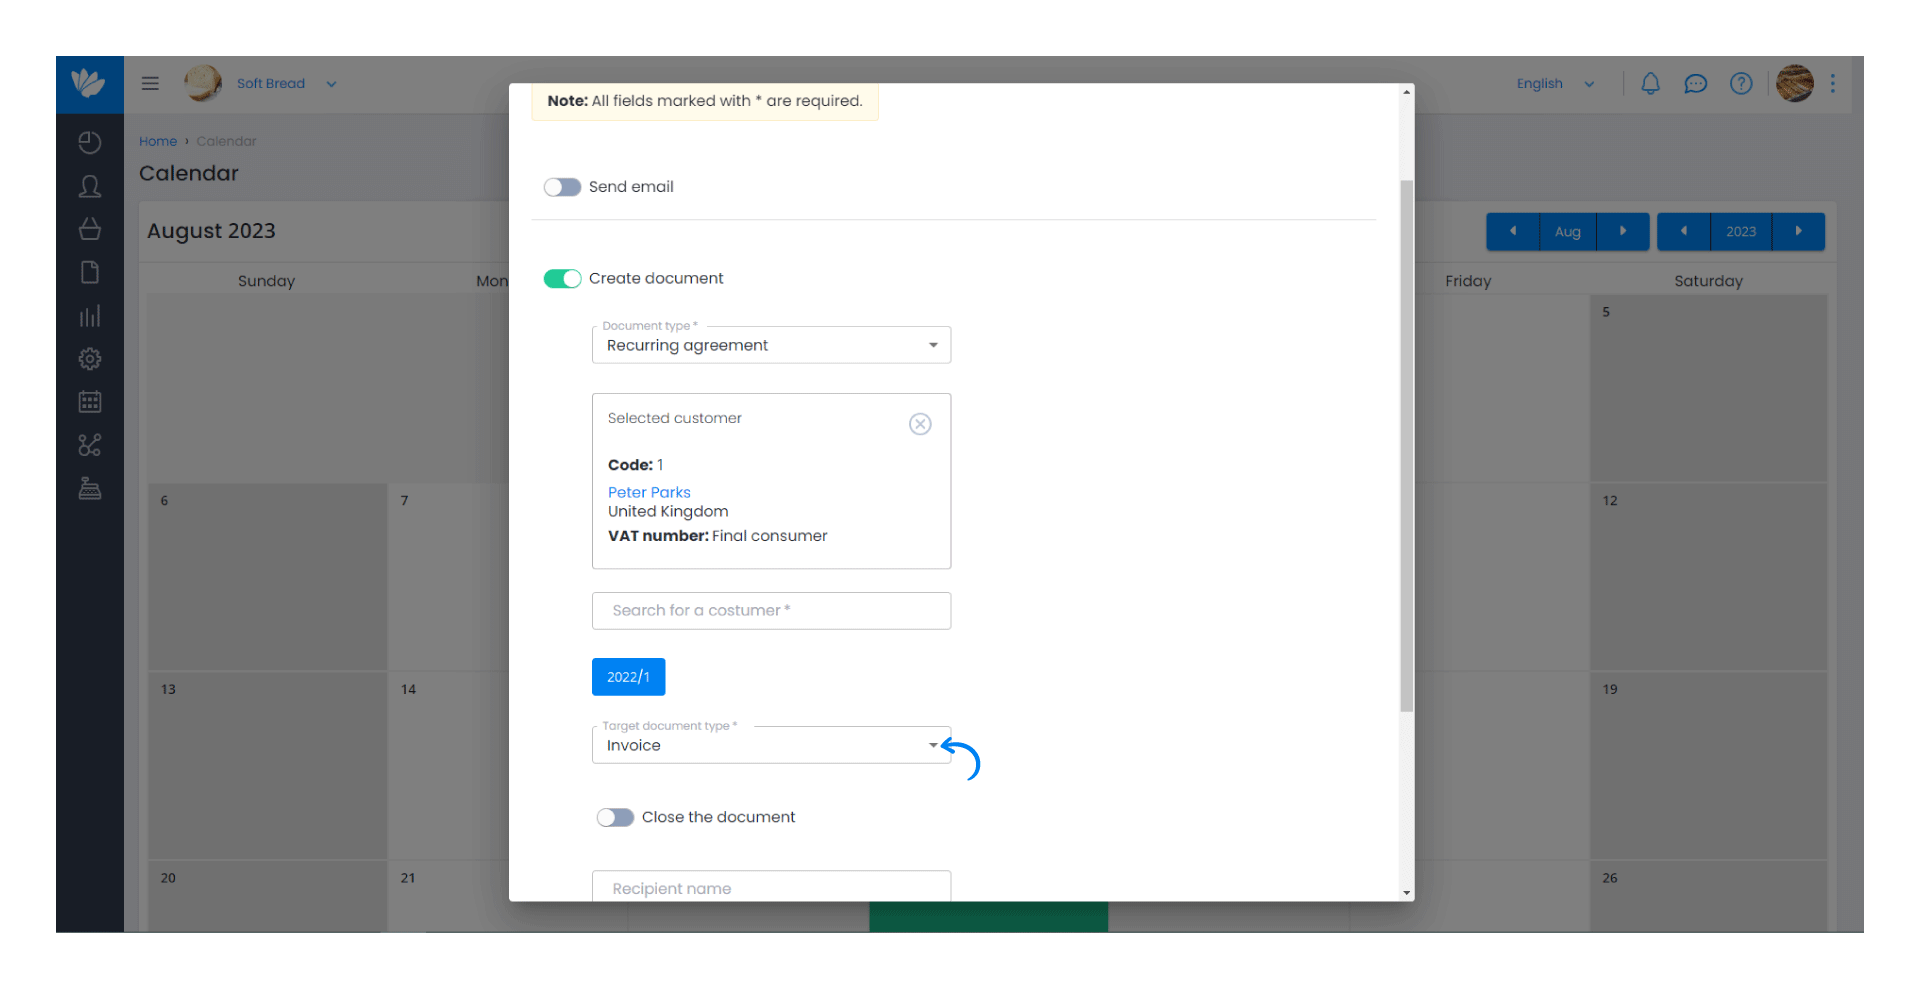
Here you also have the option Close document which must be activated so that the document can be closed and sent by e-mail.
11. Finally, fill in the information relating to the e-mail and click on Save.
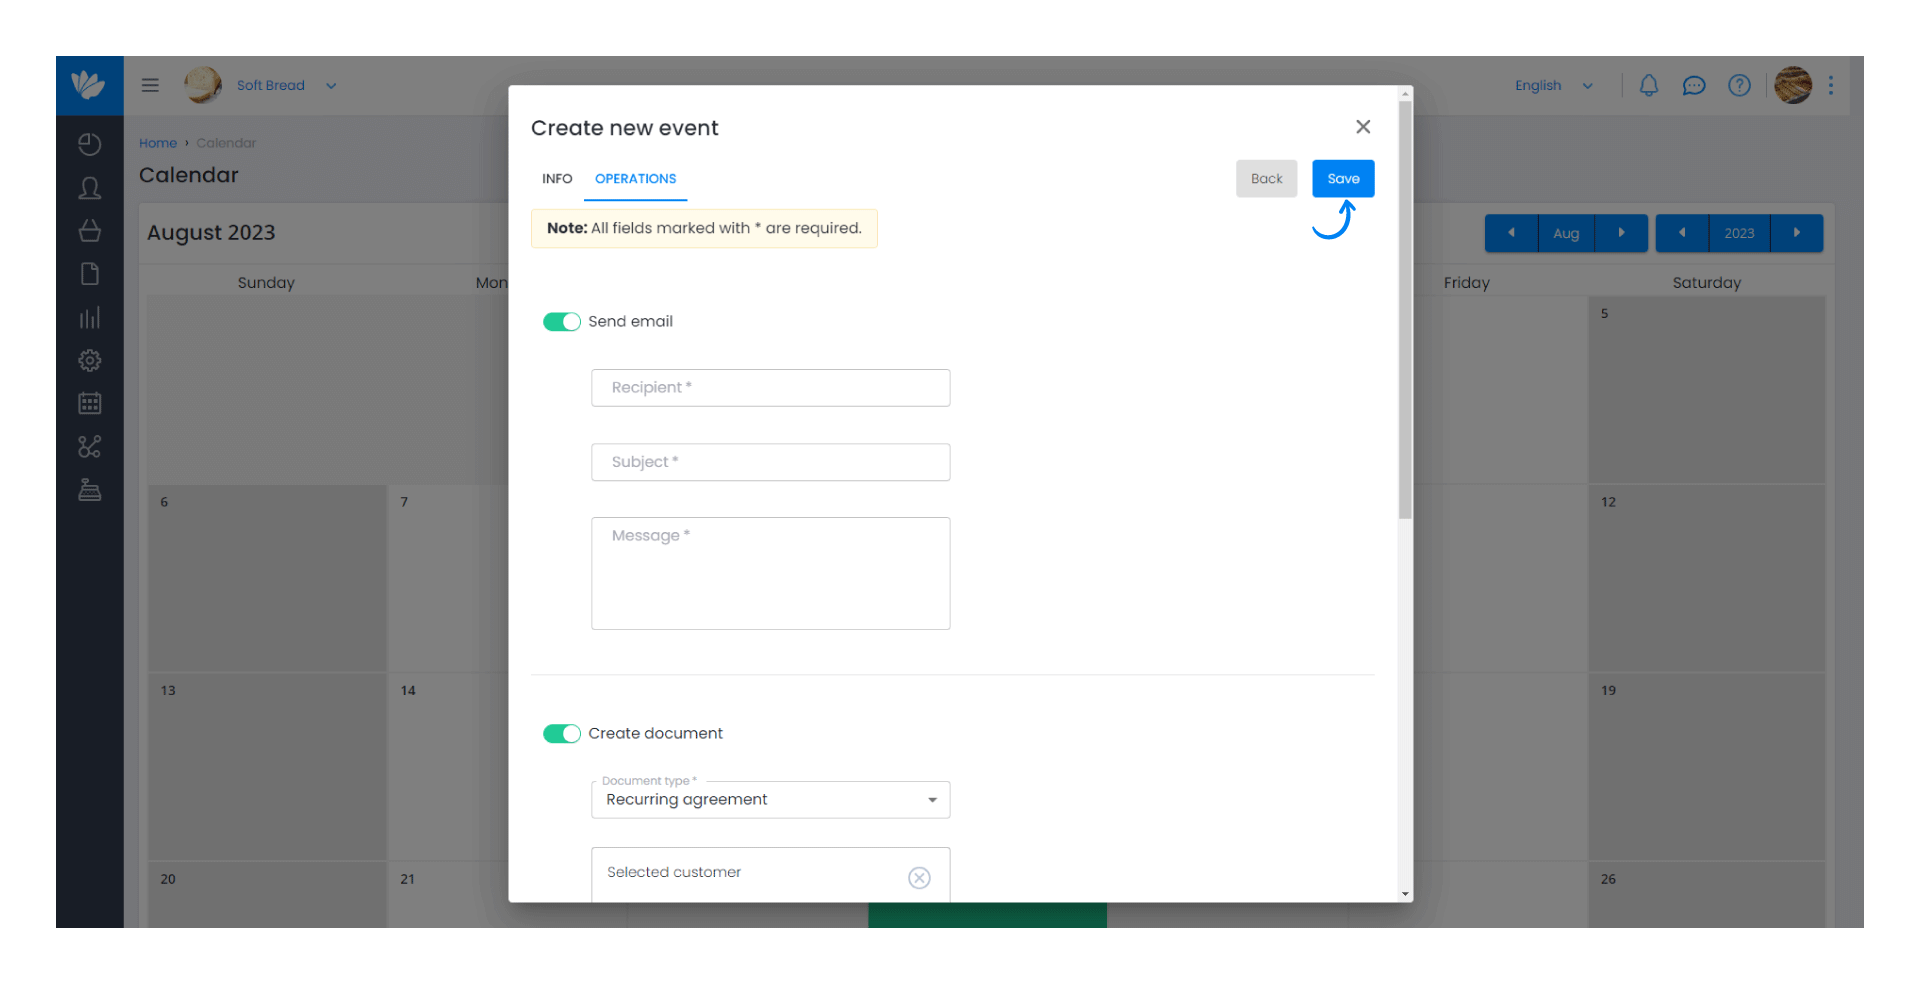
The event has been successfully created and you can view it in the Calendar.


