Guía paso a paso
¡Encuentra todos los procedimientos completamente explicados!
Siéntete siempre apoyado, incluso cuando no estás en contacto con nosotros.
How to associate users with a POS terminal?
Temas relacionados
POS Settings
POS - Points of Sale
How to associate users with a POS terminal?
In Moloni, it is possible to associate users with a POS terminal quickly and easily.
Follow these steps:
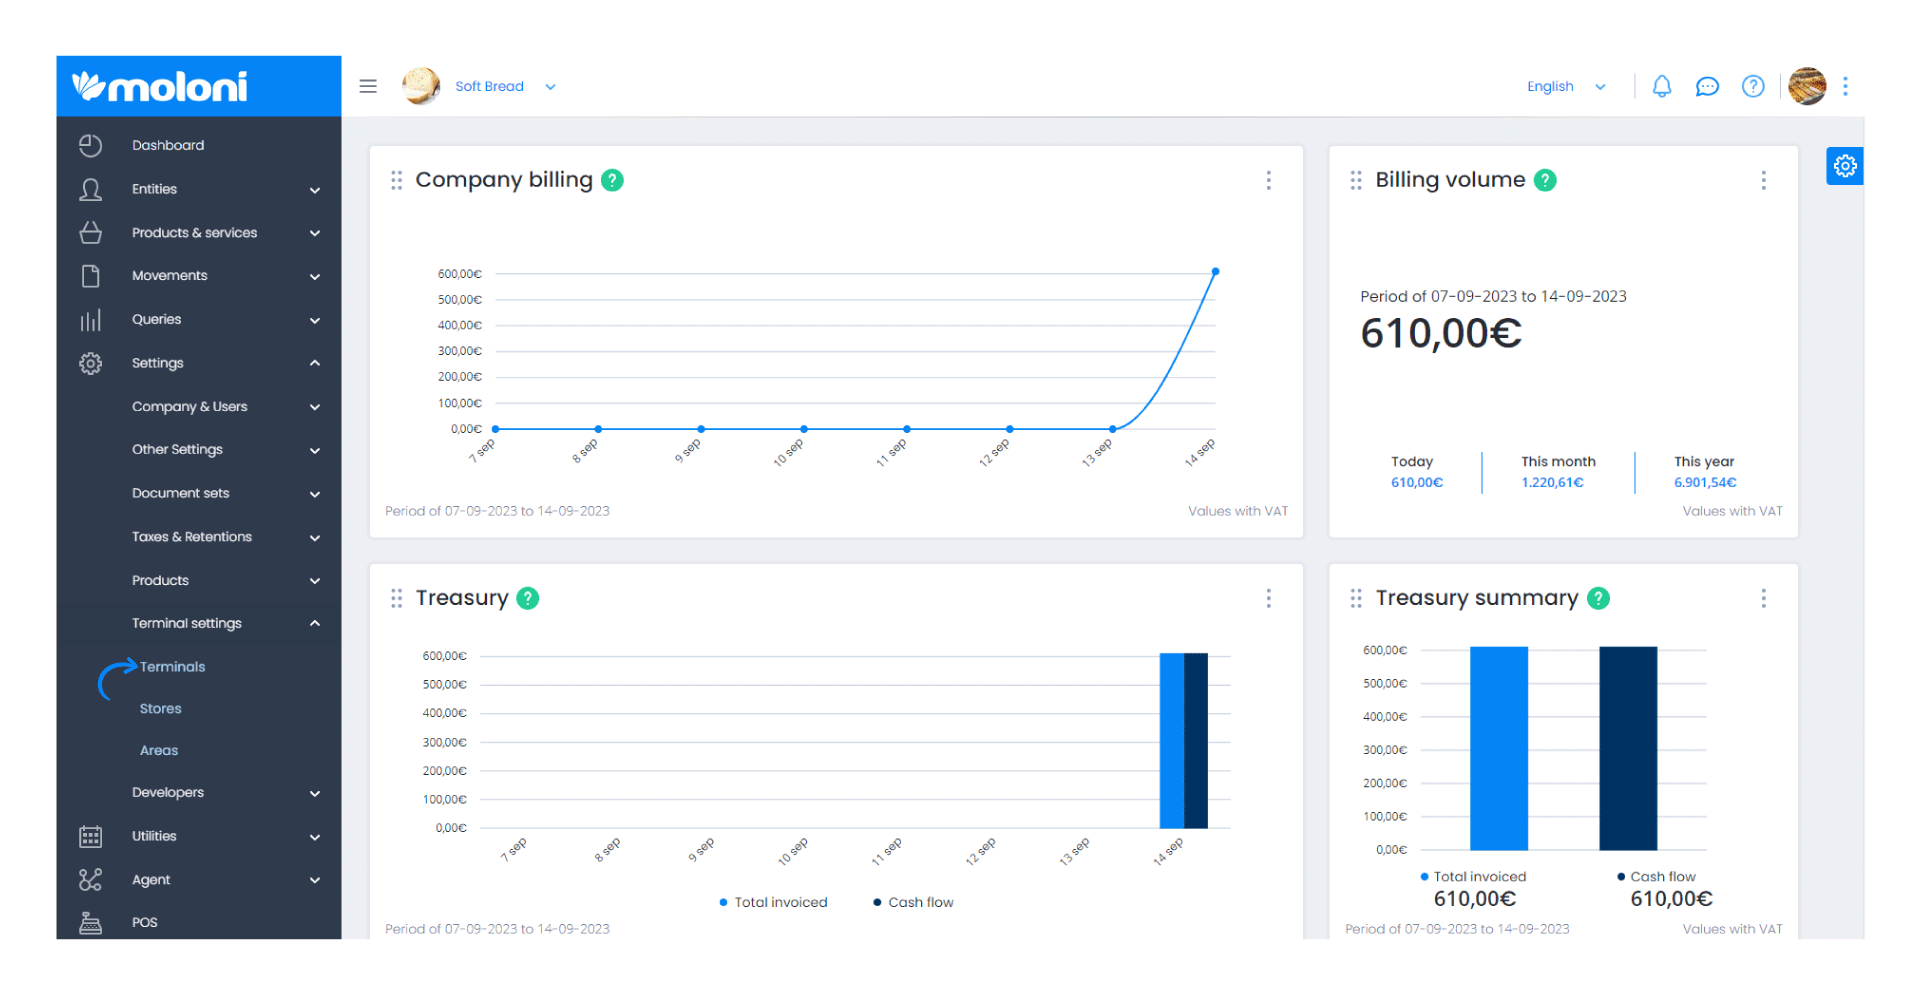
1. Go to the Settings > Terminal Settings > Terminals.
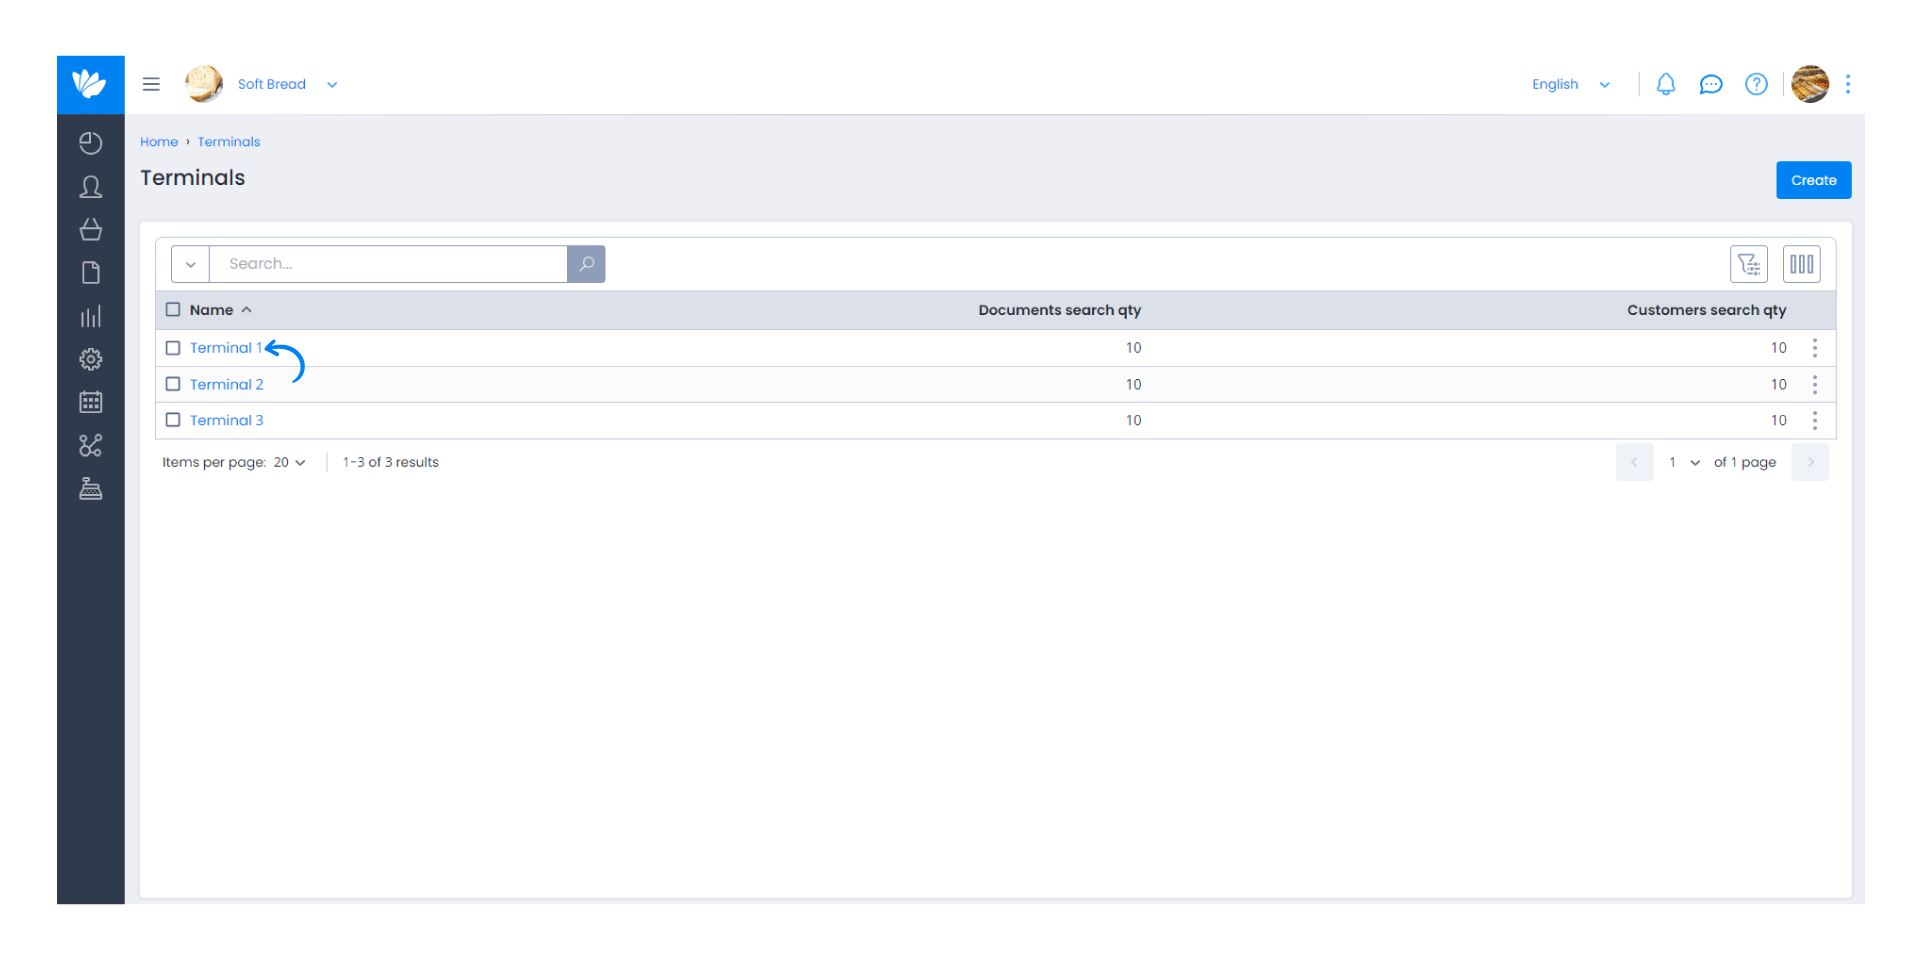
2. In this section, you will find the terminals available to associate users. Select the terminal you want to associate users with.
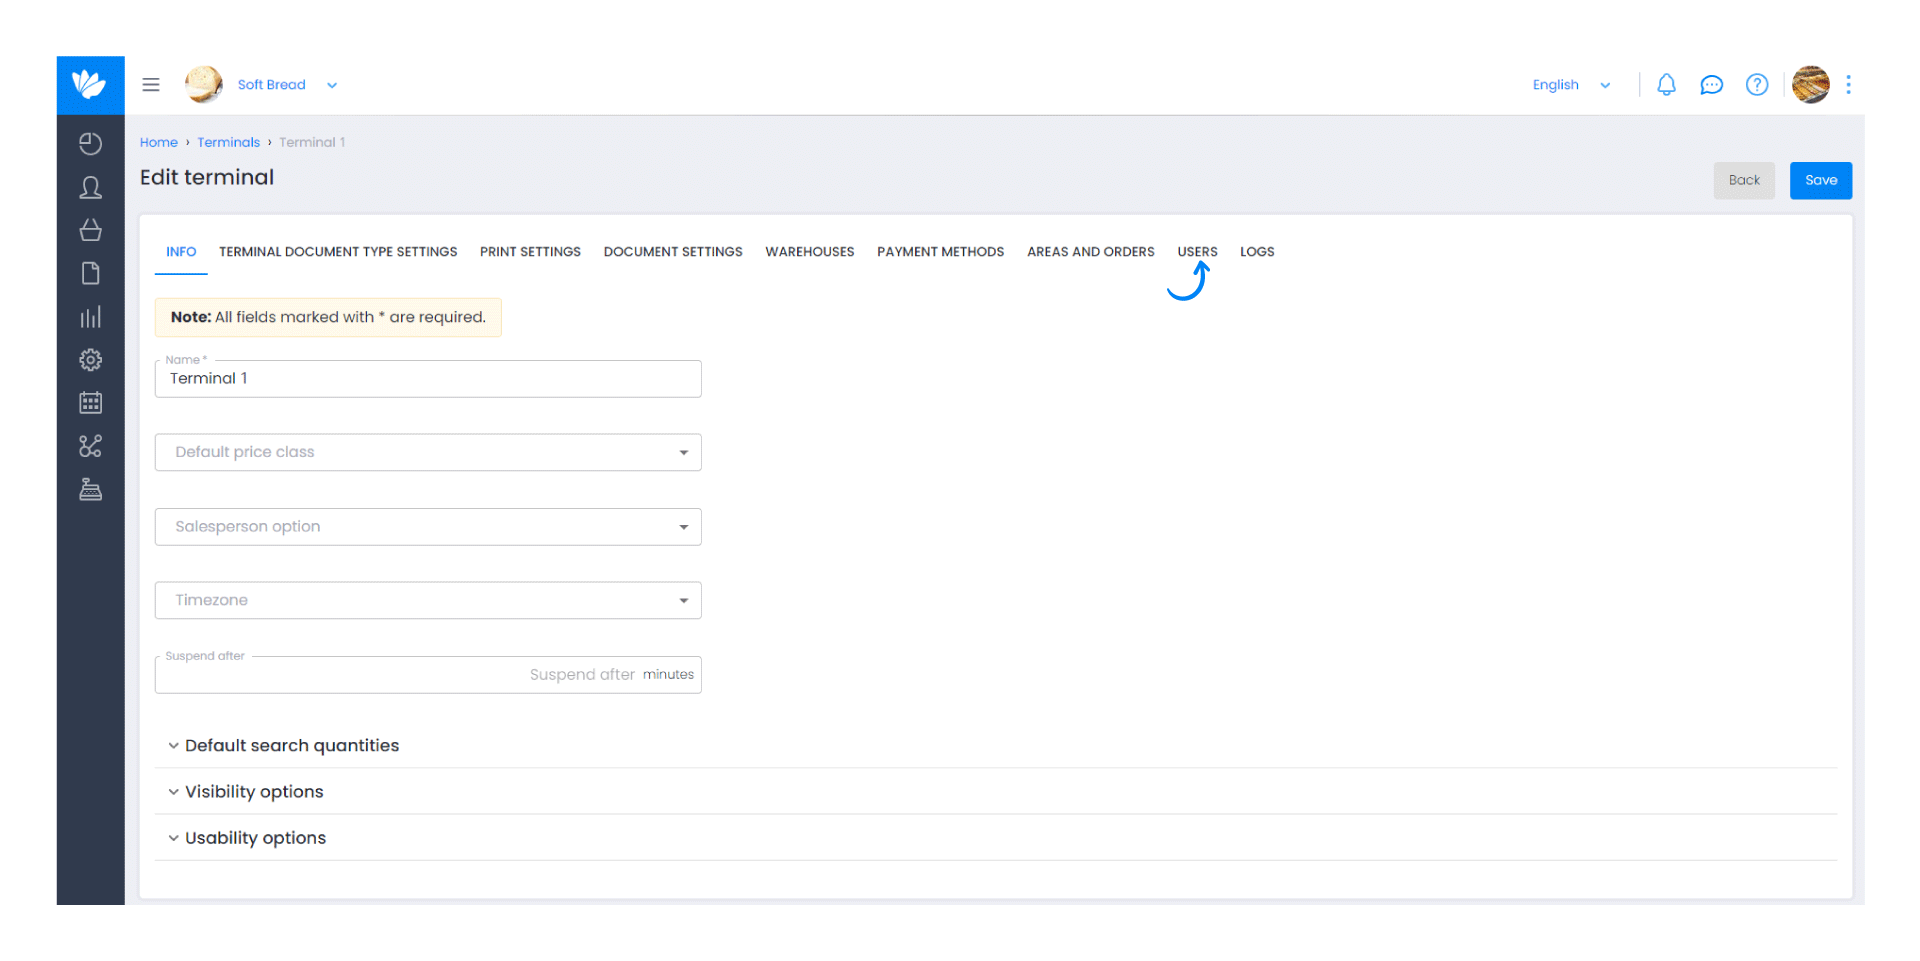
3. Click on the Users tab.
4. In the Available users section, select the user to assign to the terminal by clicking the button with an arrow (>).
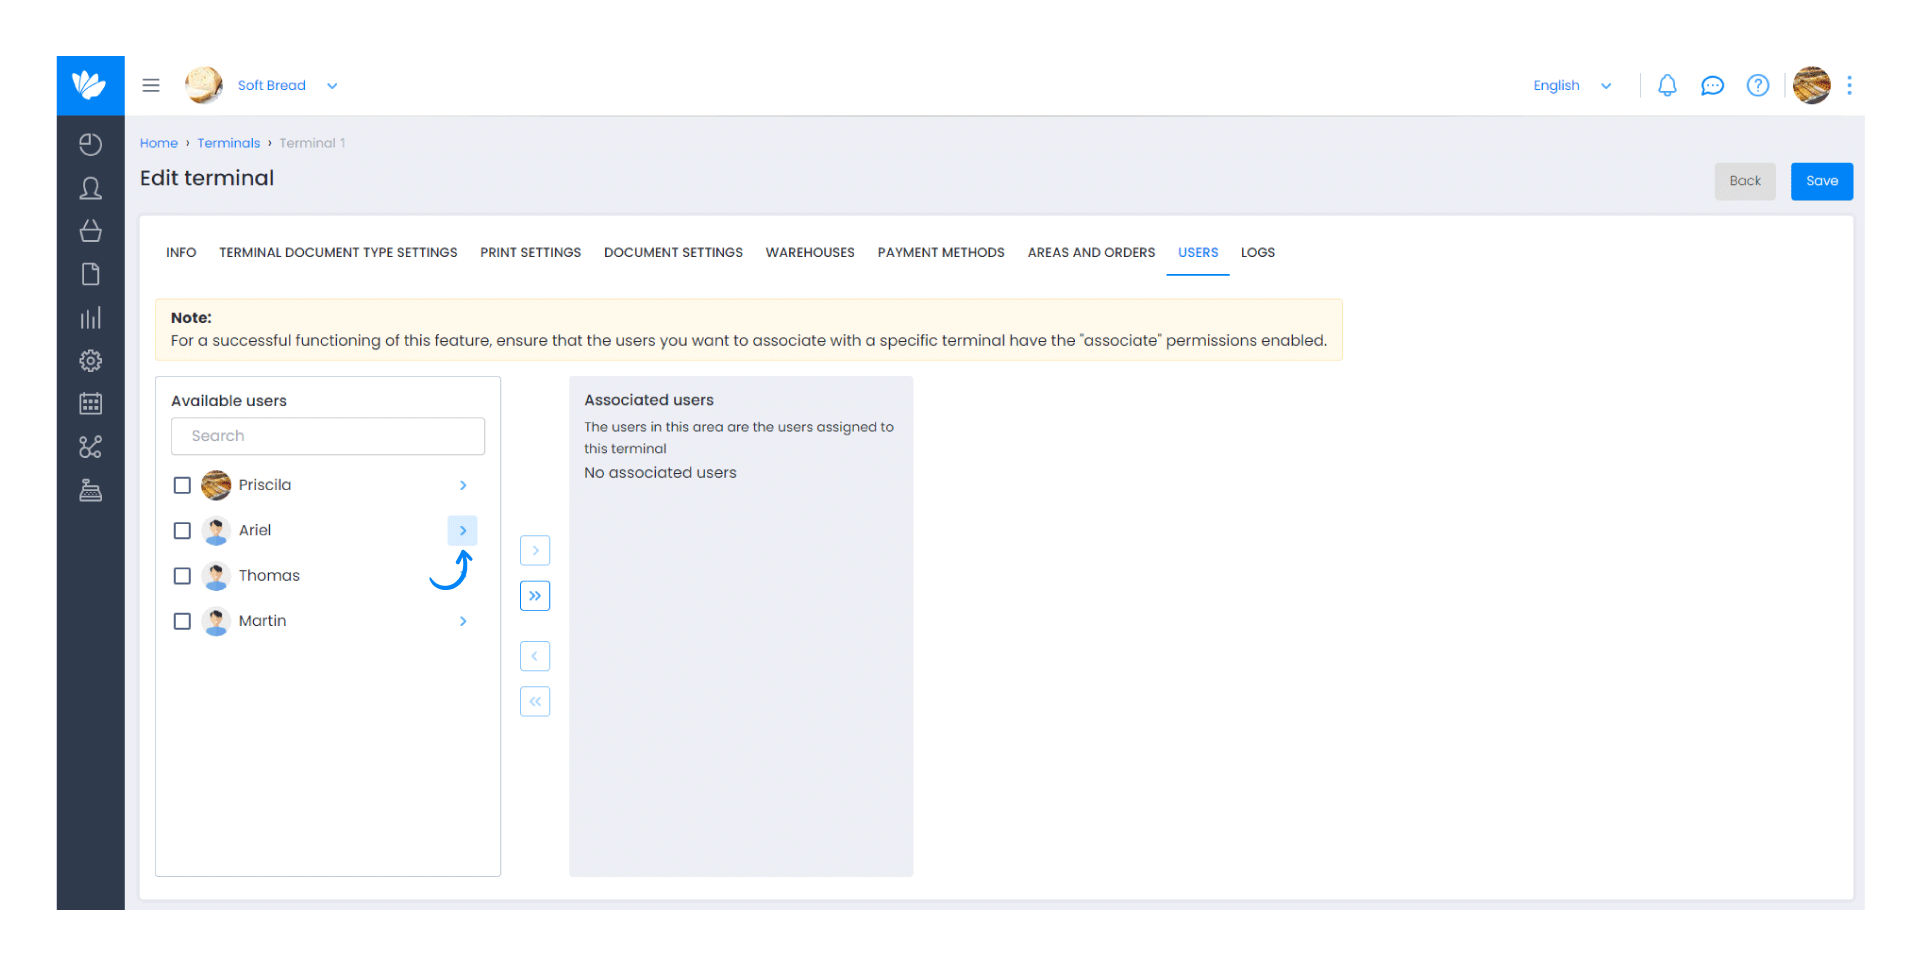
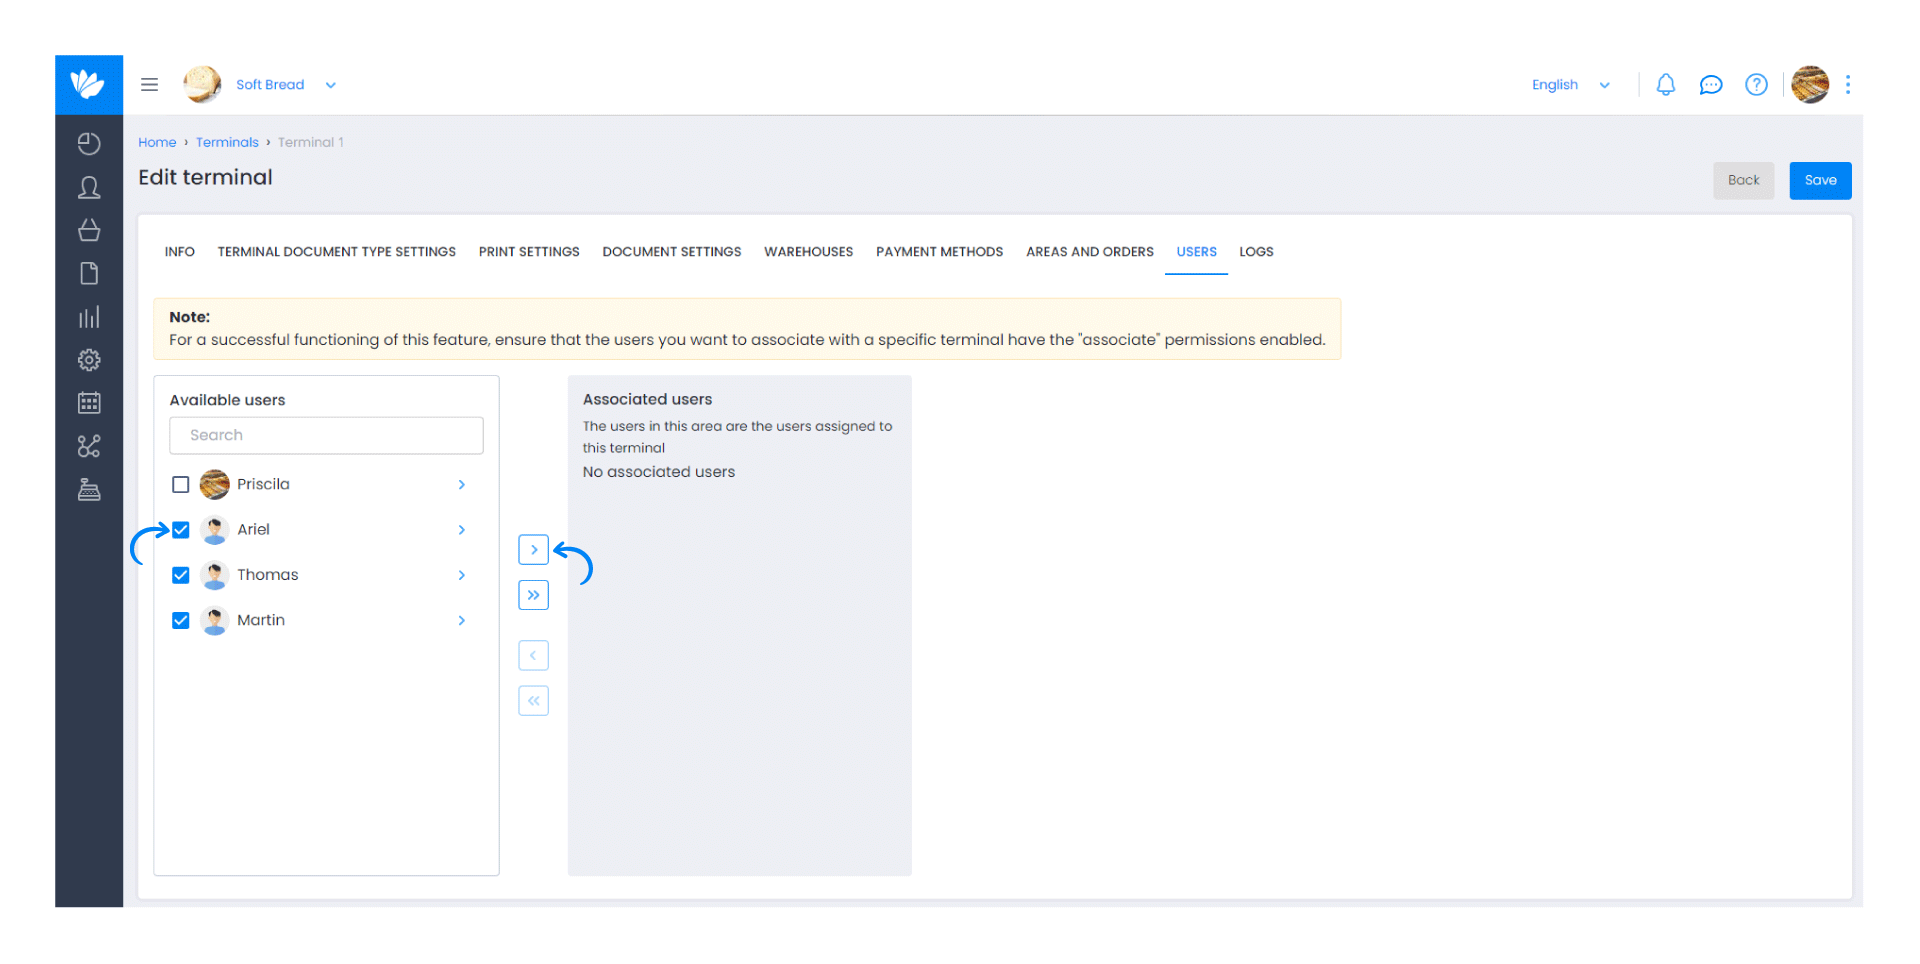
If you want to associate multiple users at the same time, activate their respective checkboxes and click the button with an arrow (>).
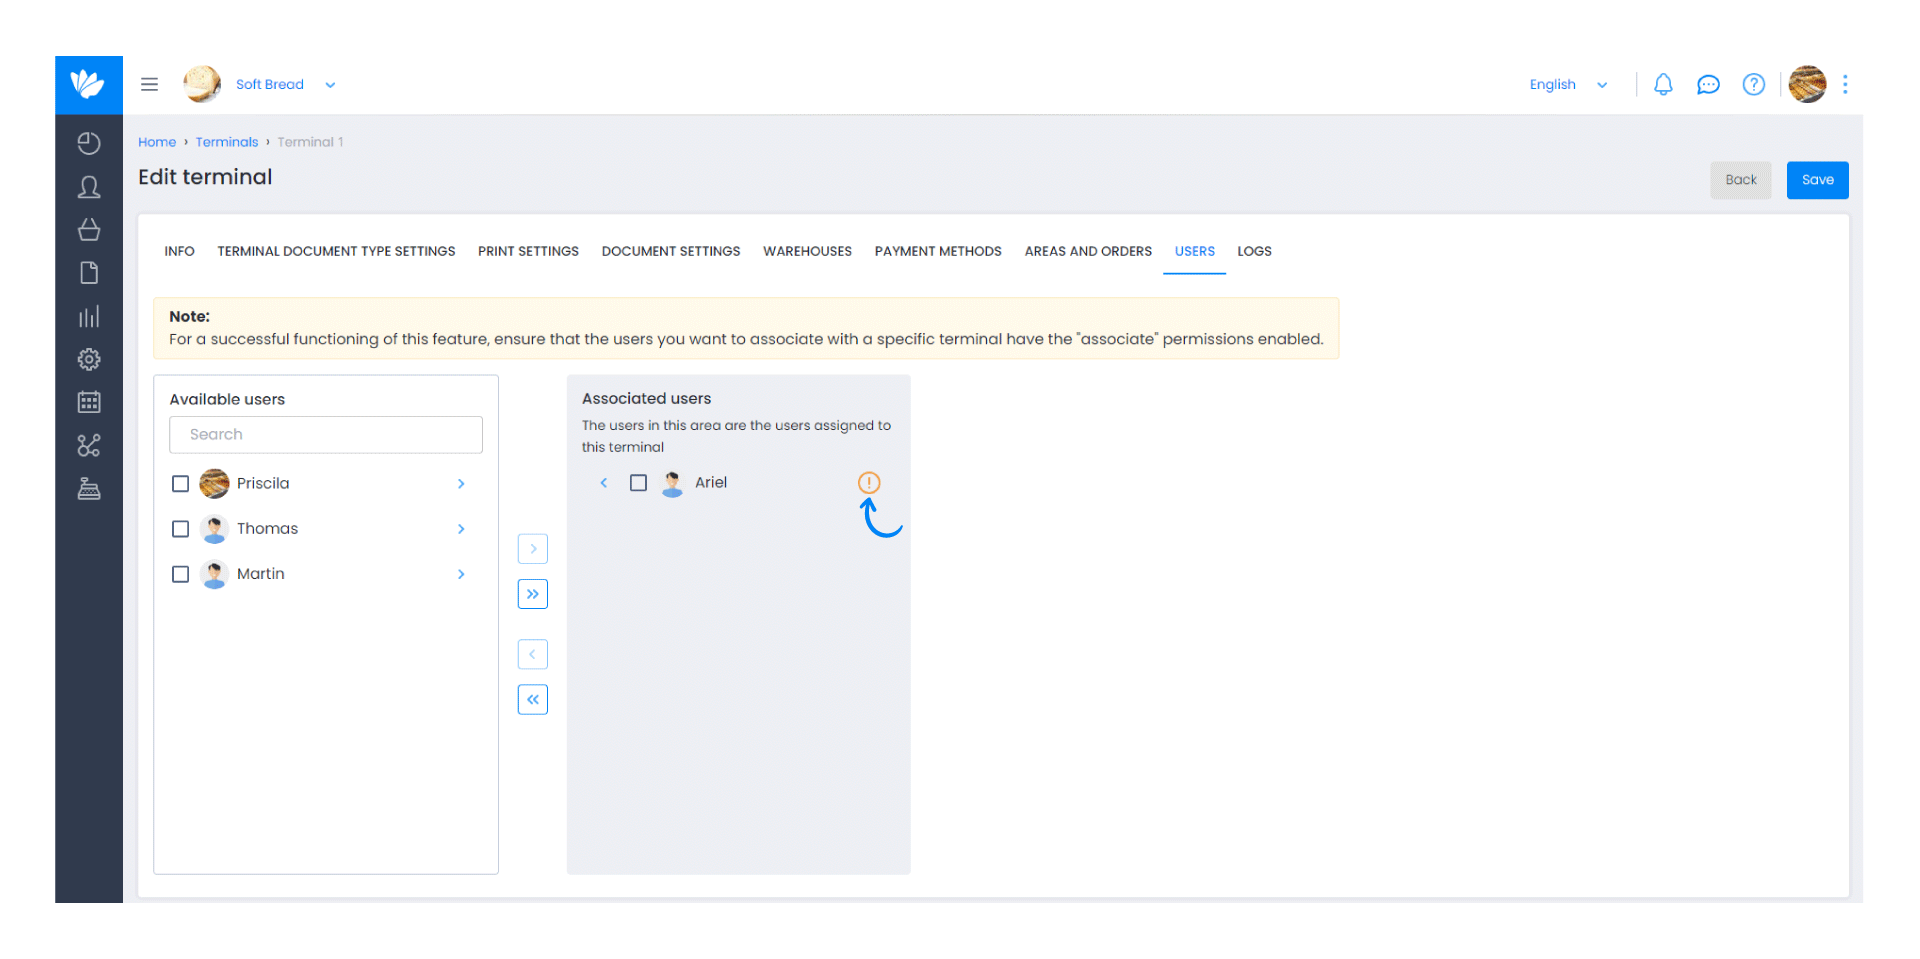
5. If any of the users do not have the necessary permissions, an orange alert icon will appear. Click on it.
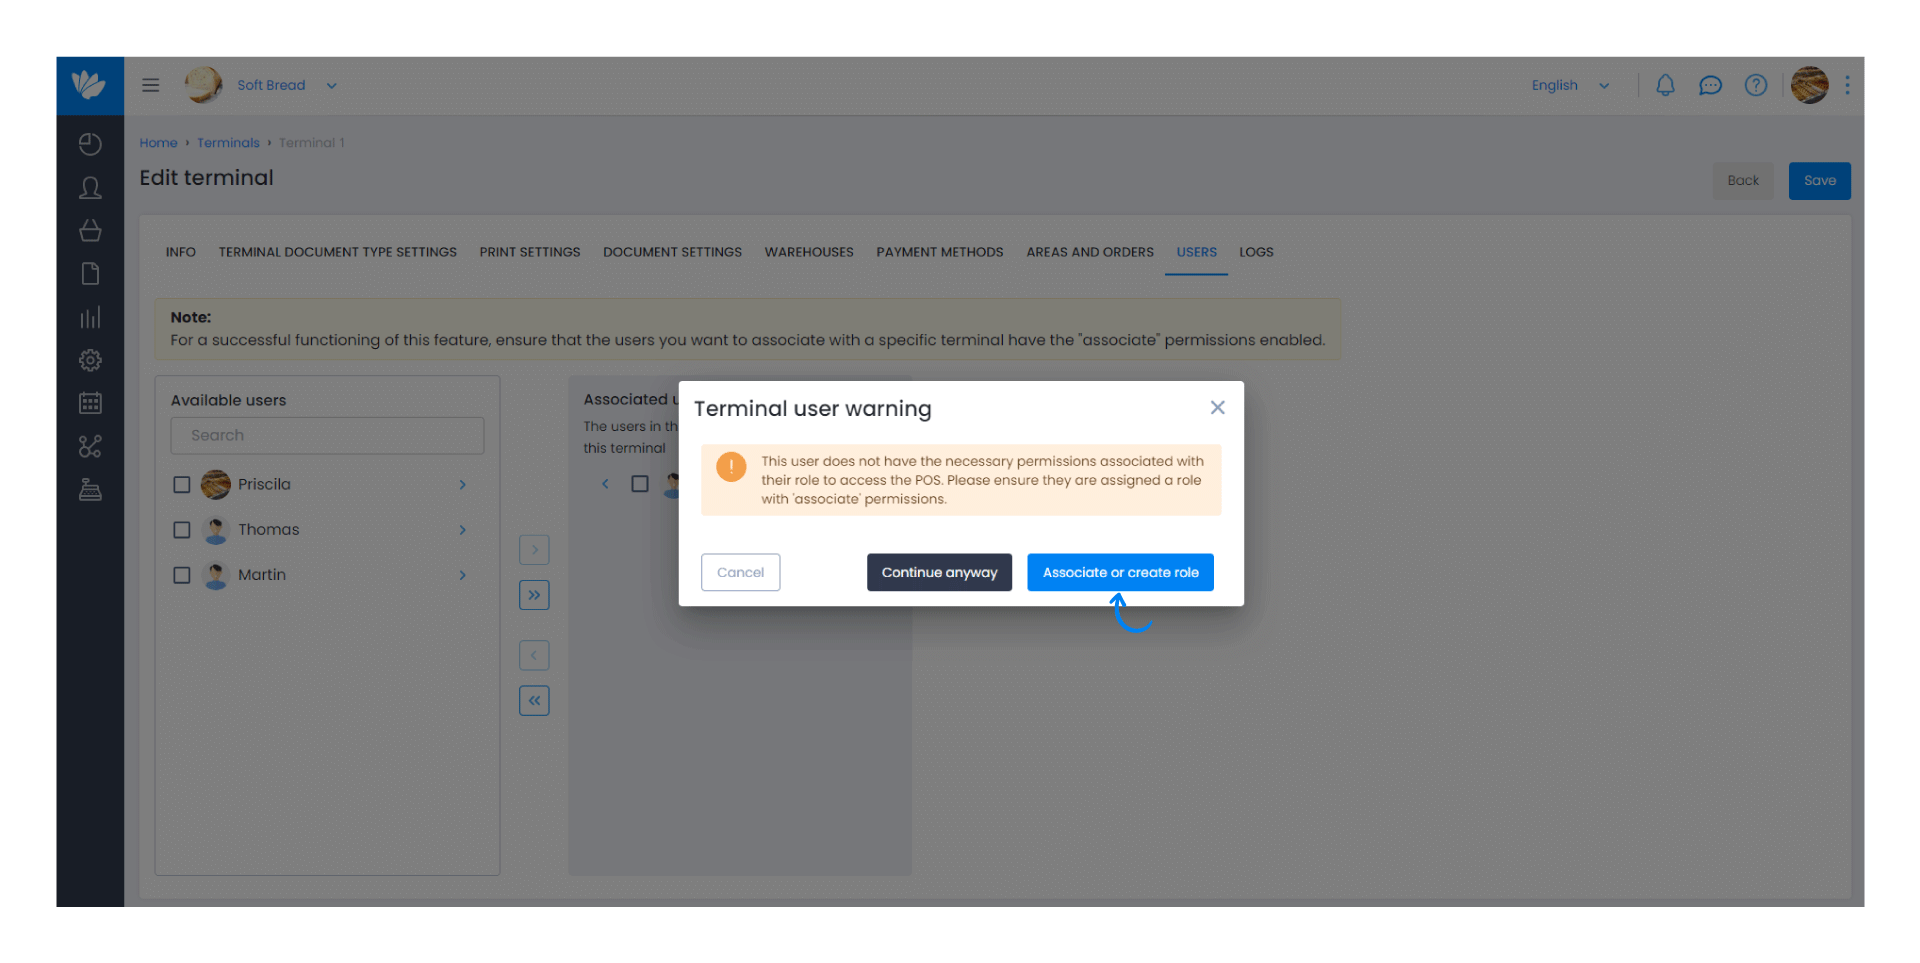
6. Click on the Associate or create role button.
7. In the Role field, select a valid position (identified with a green icon).
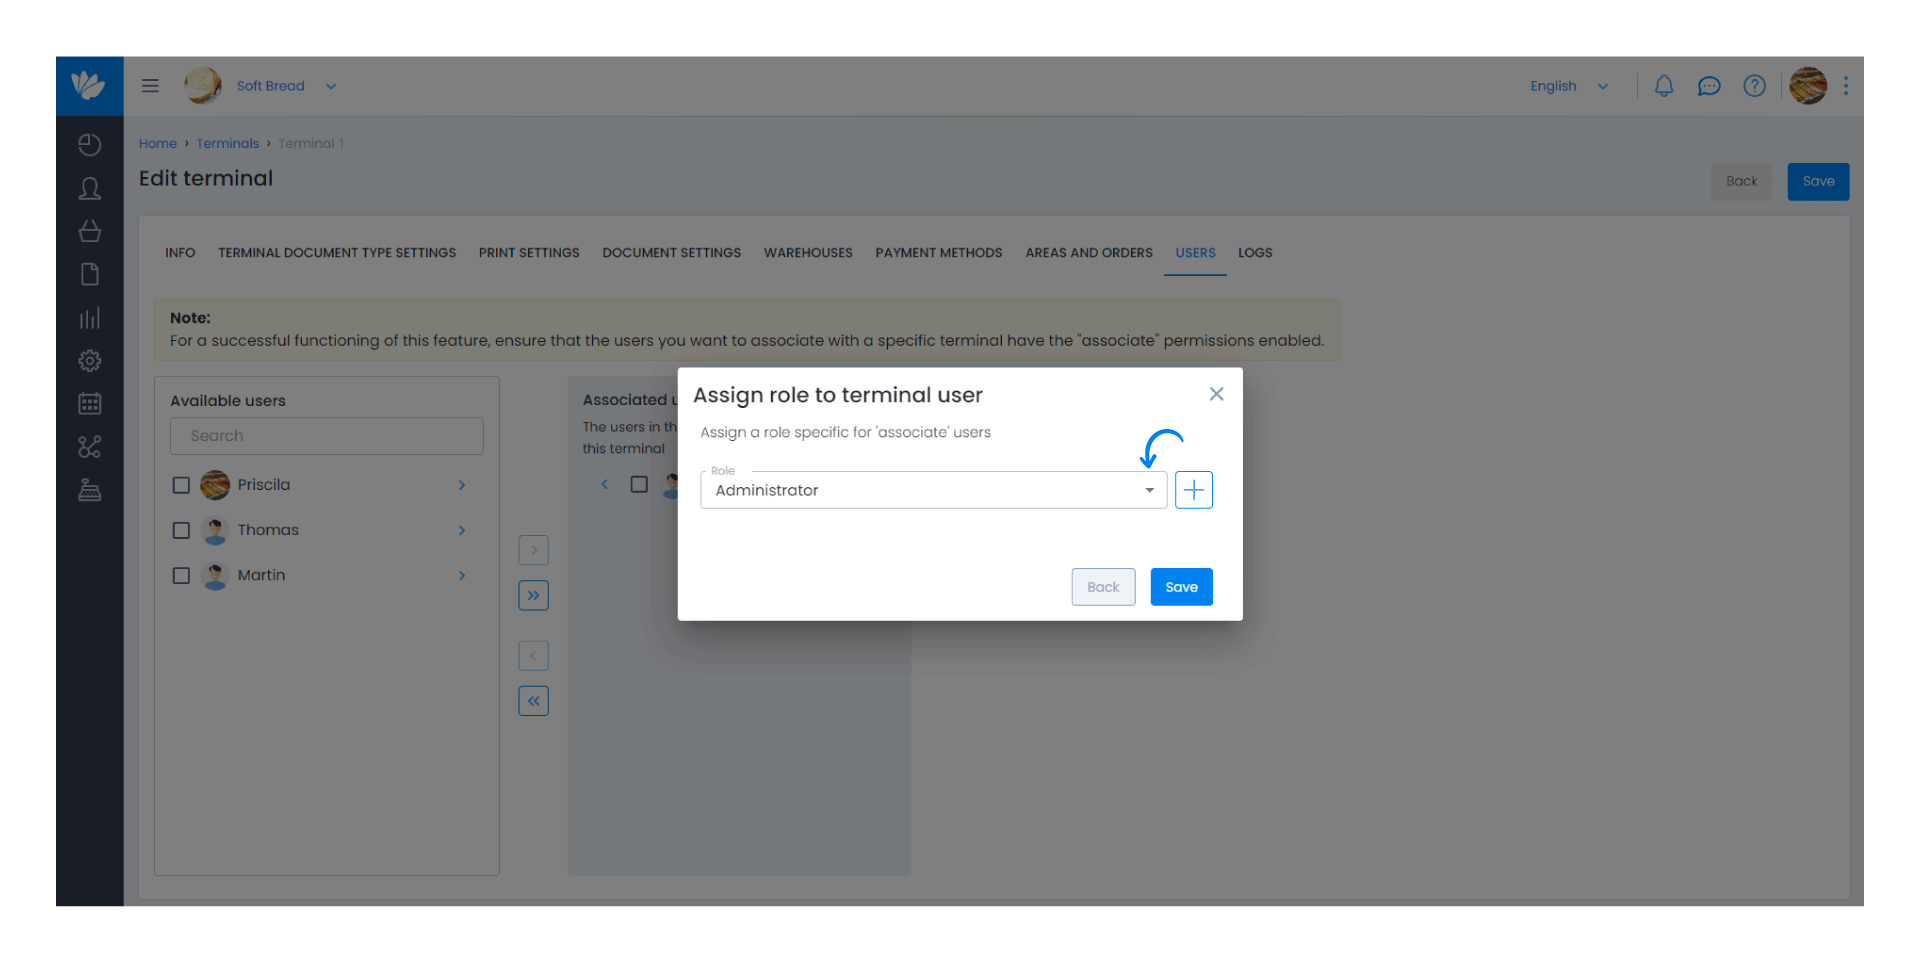
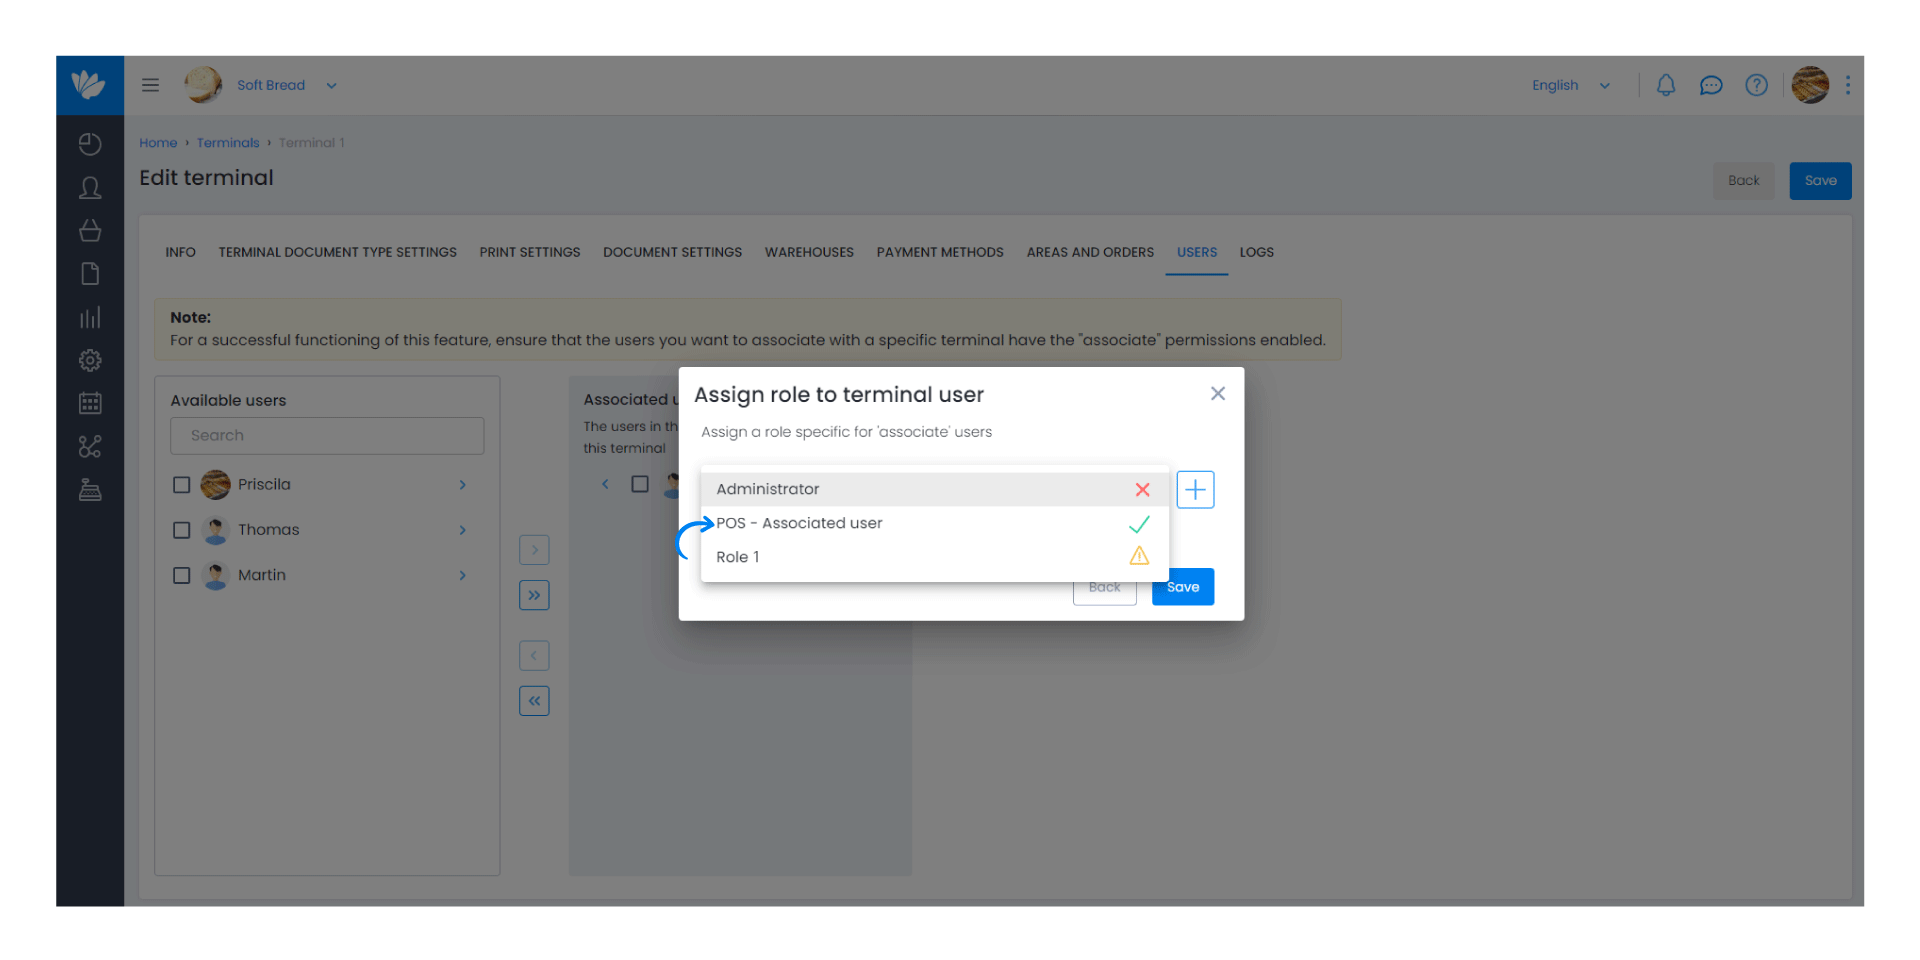
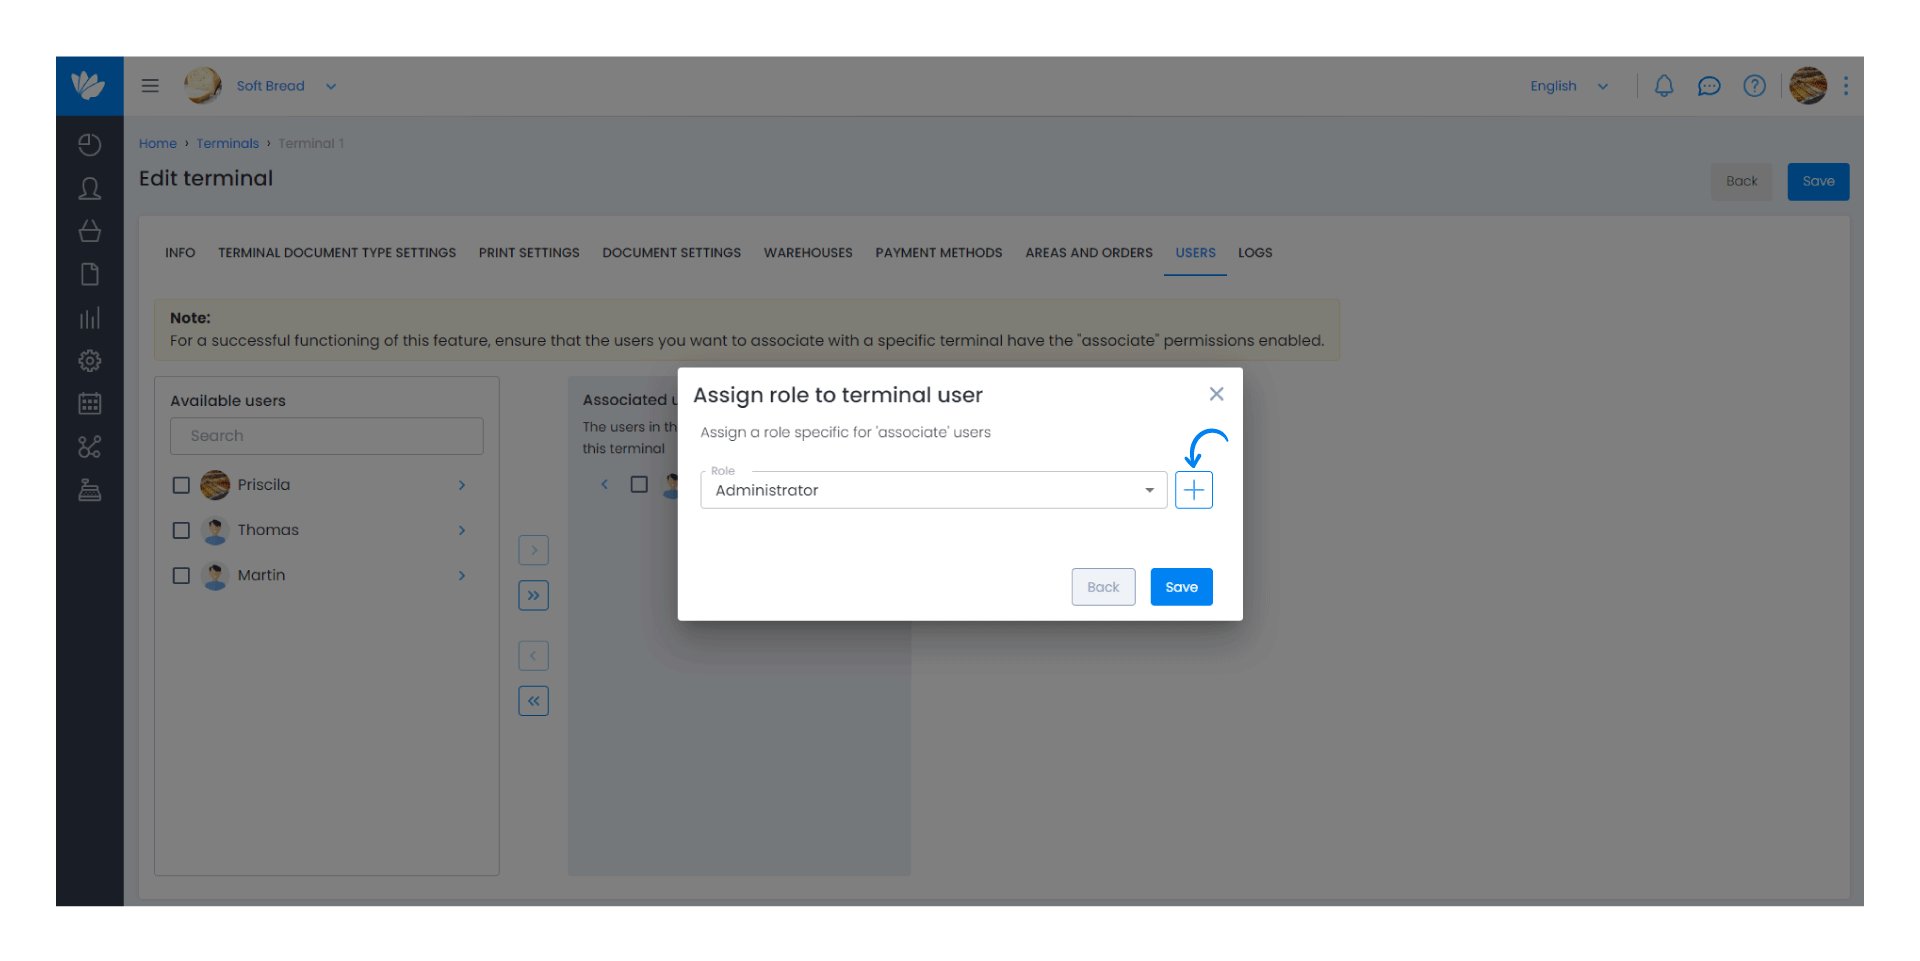
8. If you don't have a valid position, add a new one by clicking the (+) button.
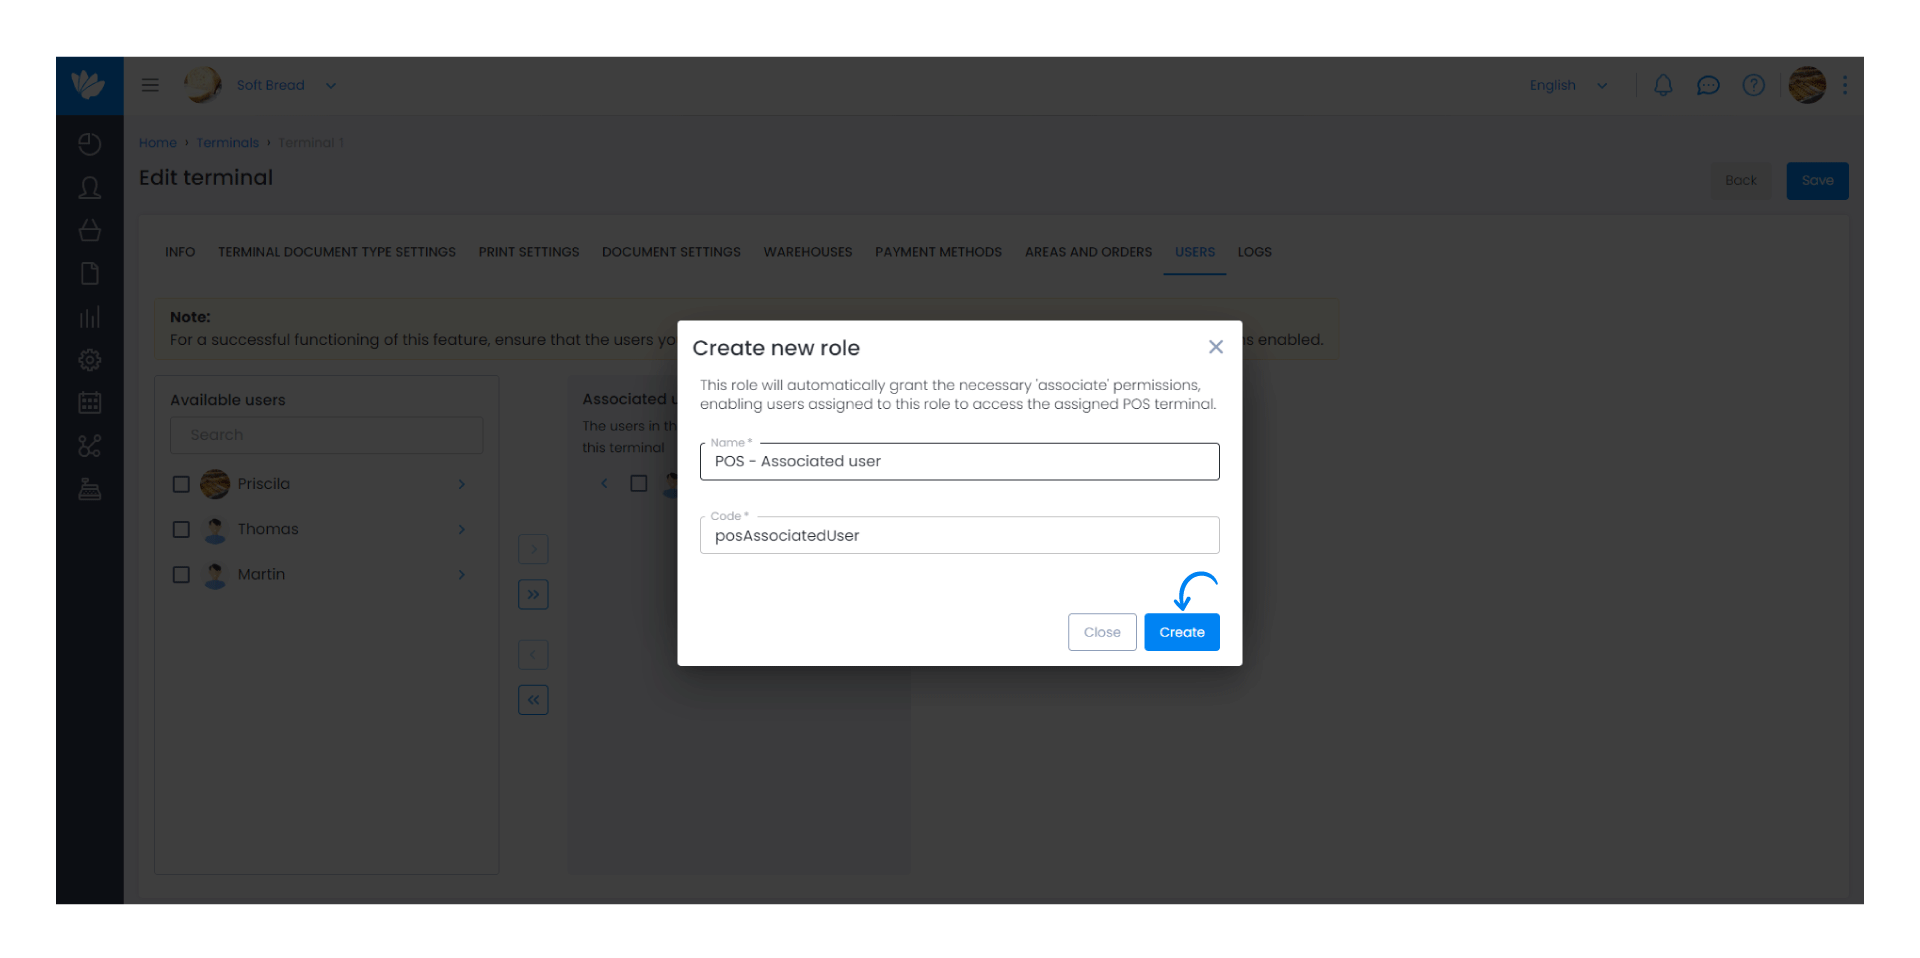
9. The POS - Associated user role will appear. This position is created by default so that you can associate users with the POS terminal with the necessary permissions. Click Create.
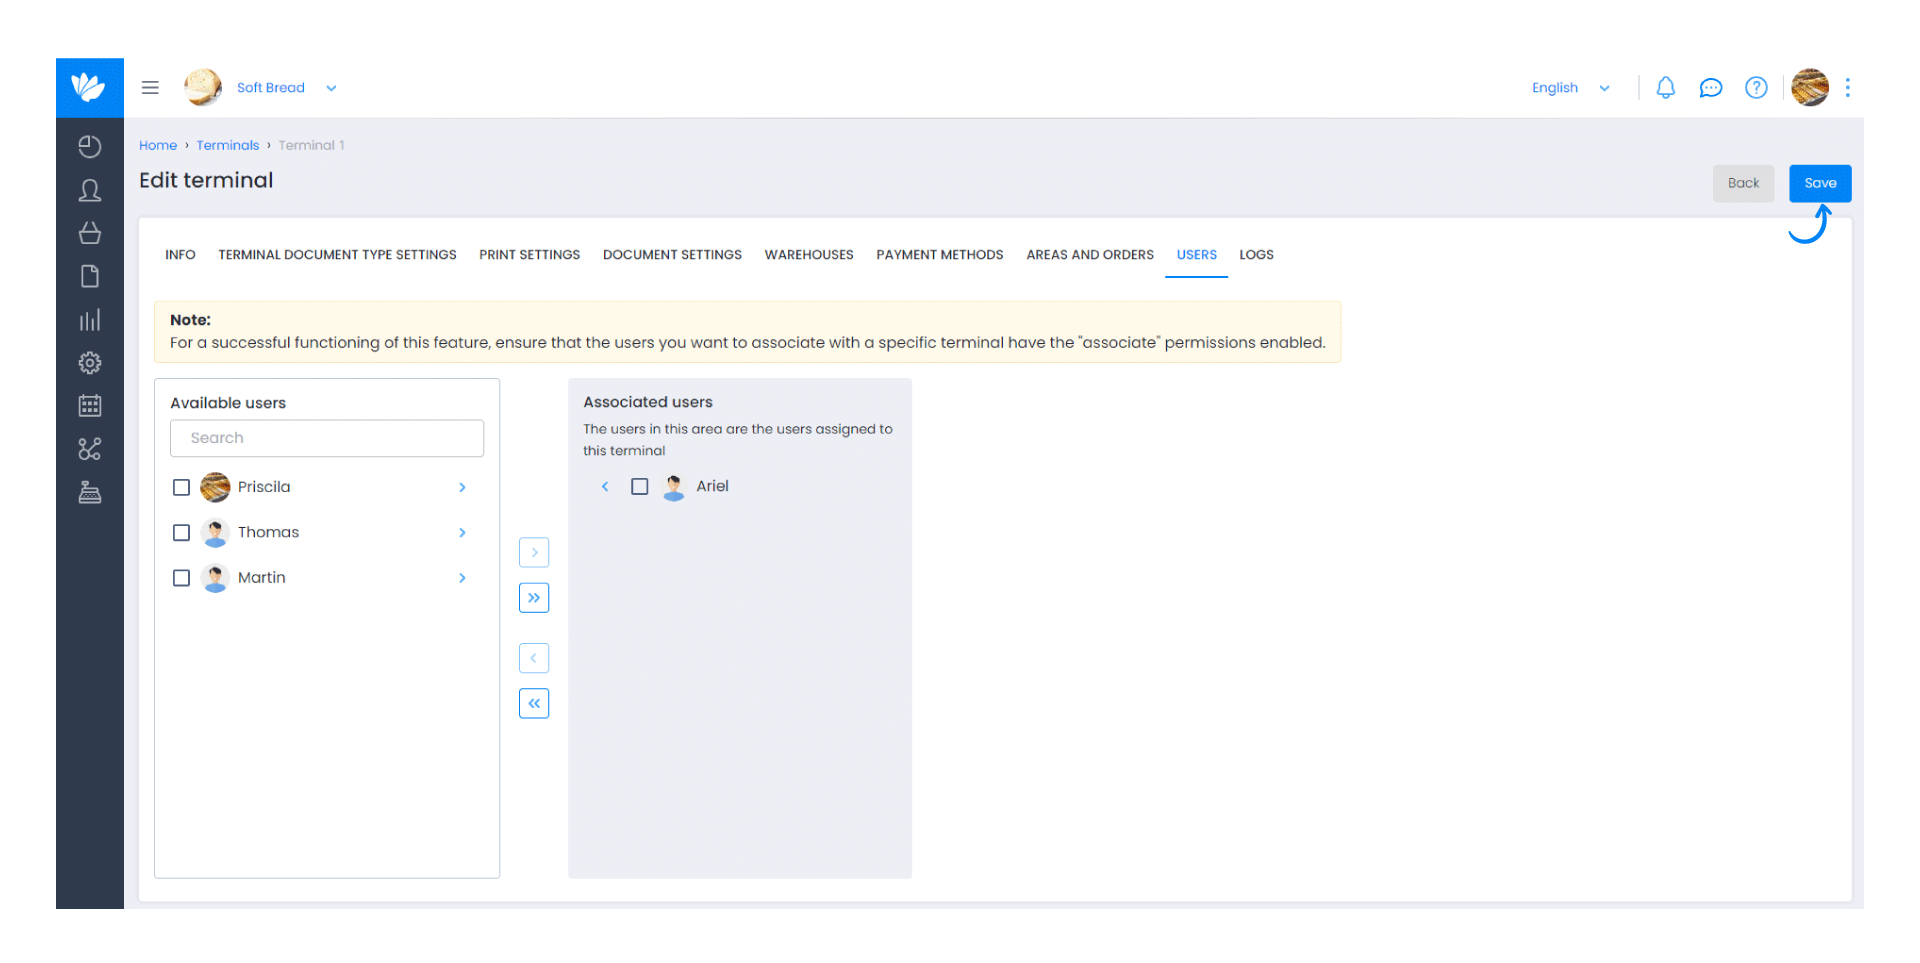
10. Finally, click Save.
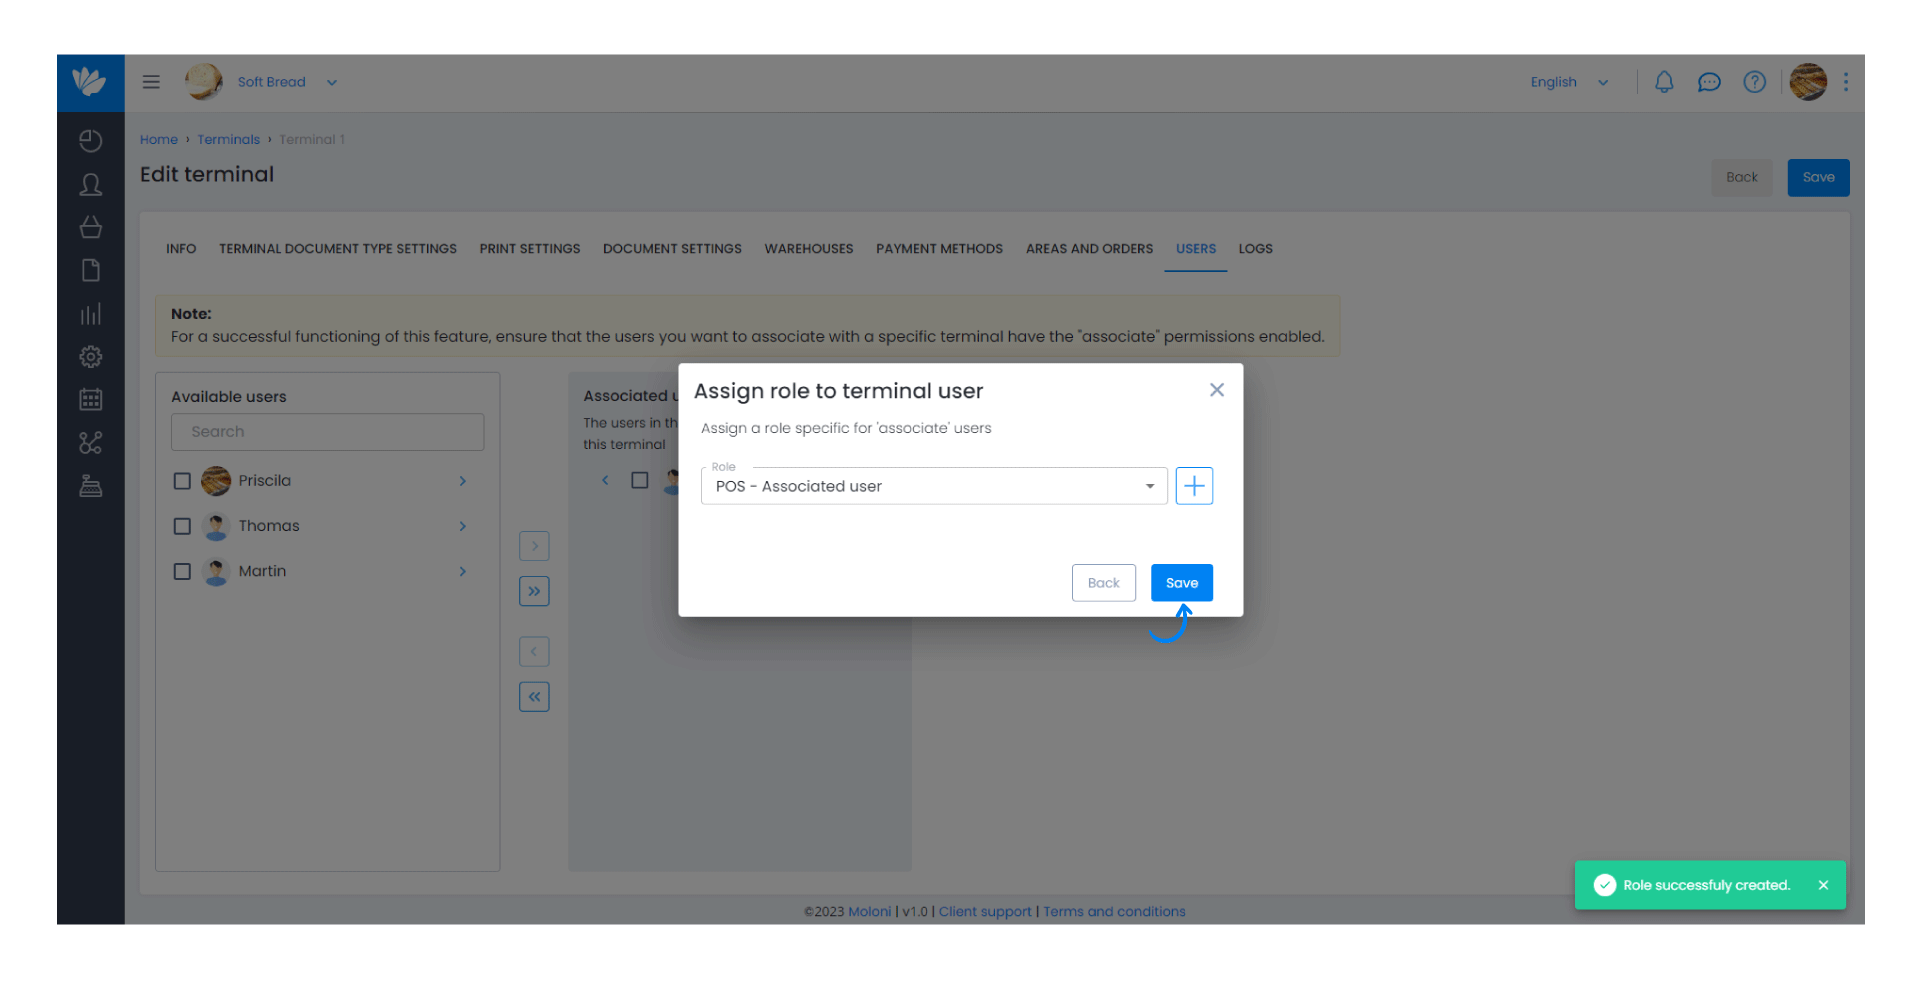
11. The necessary permissions have been successfully assigned. Finally, click Save.
